Map-Making


A illustrated map of Swamp-Ridge-on-Sea. A fictional island where supernatural creatures live.

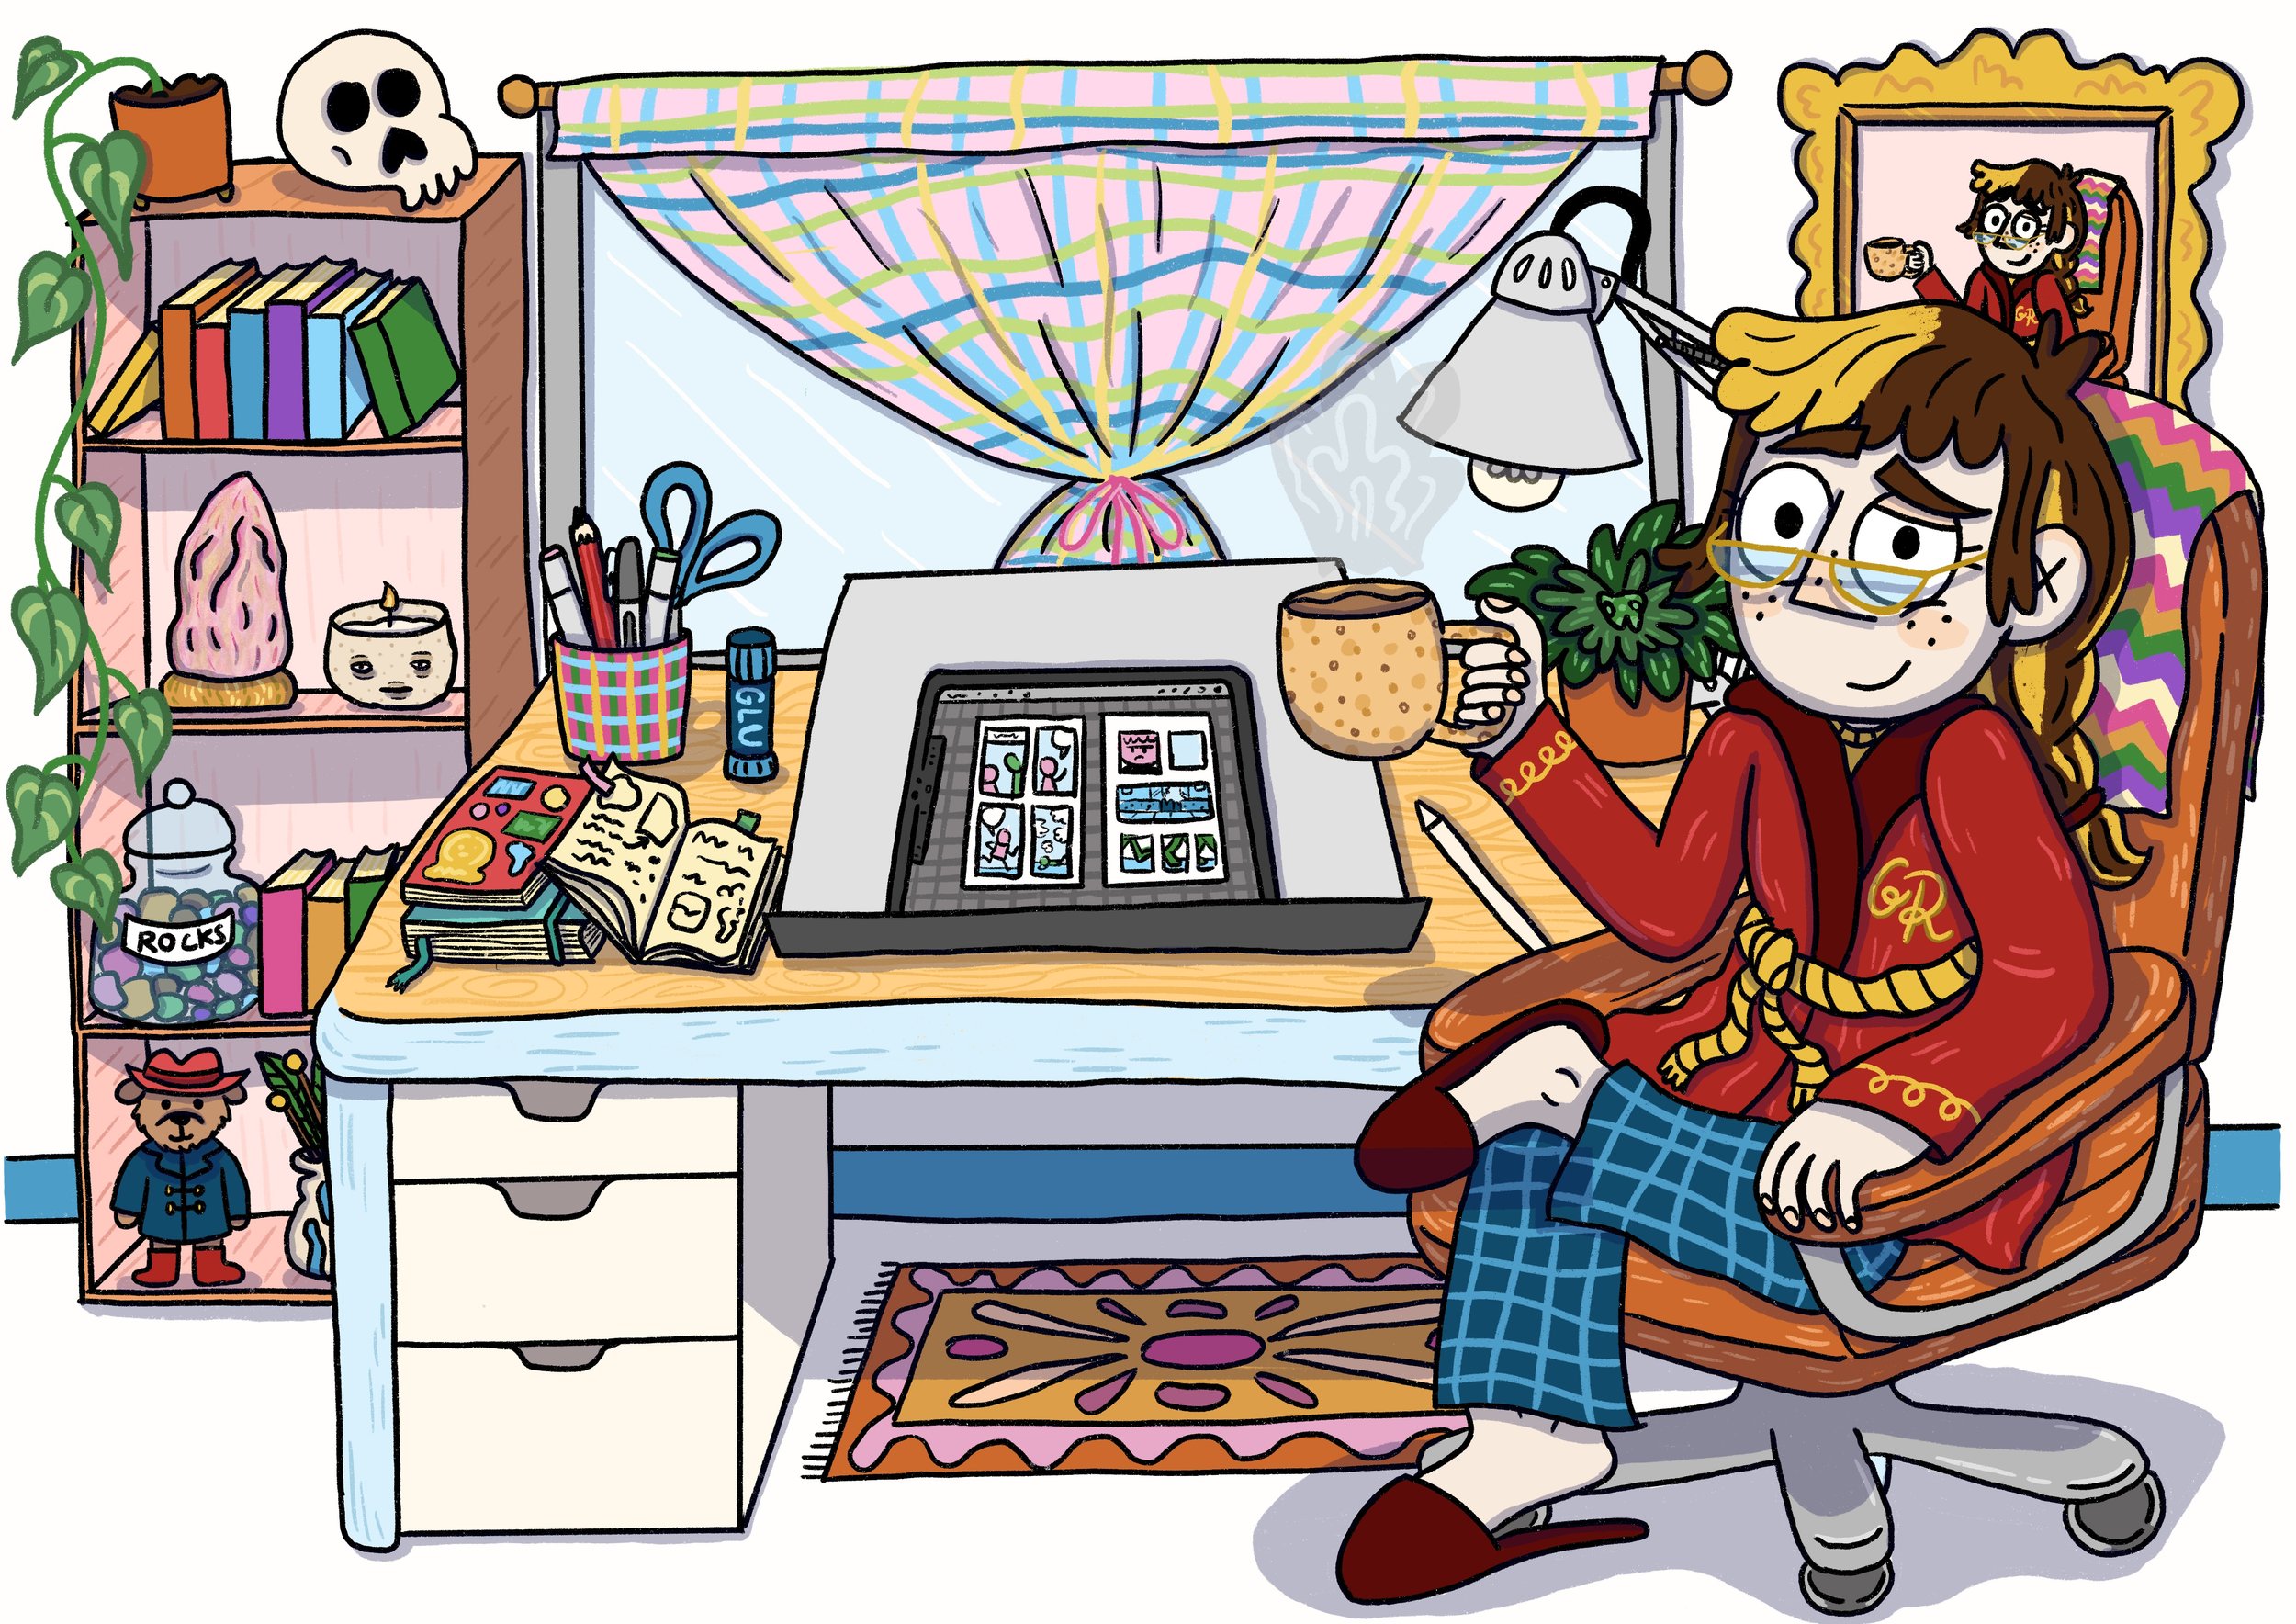
One of my very first loves was map-making: as a kid, maps were one of my favourite things to draw. I would make maps of treasure islands, maps of our neighbourhood and maps of my bedroom (usually during my annual rearranging-fest when I was trying to figure out where I wanted my stuff to be for MAXIMUM BEDROOM PERFECTION. As an adult I still do this but for my studio. The never-ending goal of finding just the right place for everything is a curse I am willing to bear.

Illustrated diagram of the same bedroom with 3 room variations, titled “Various permutations of my room”.

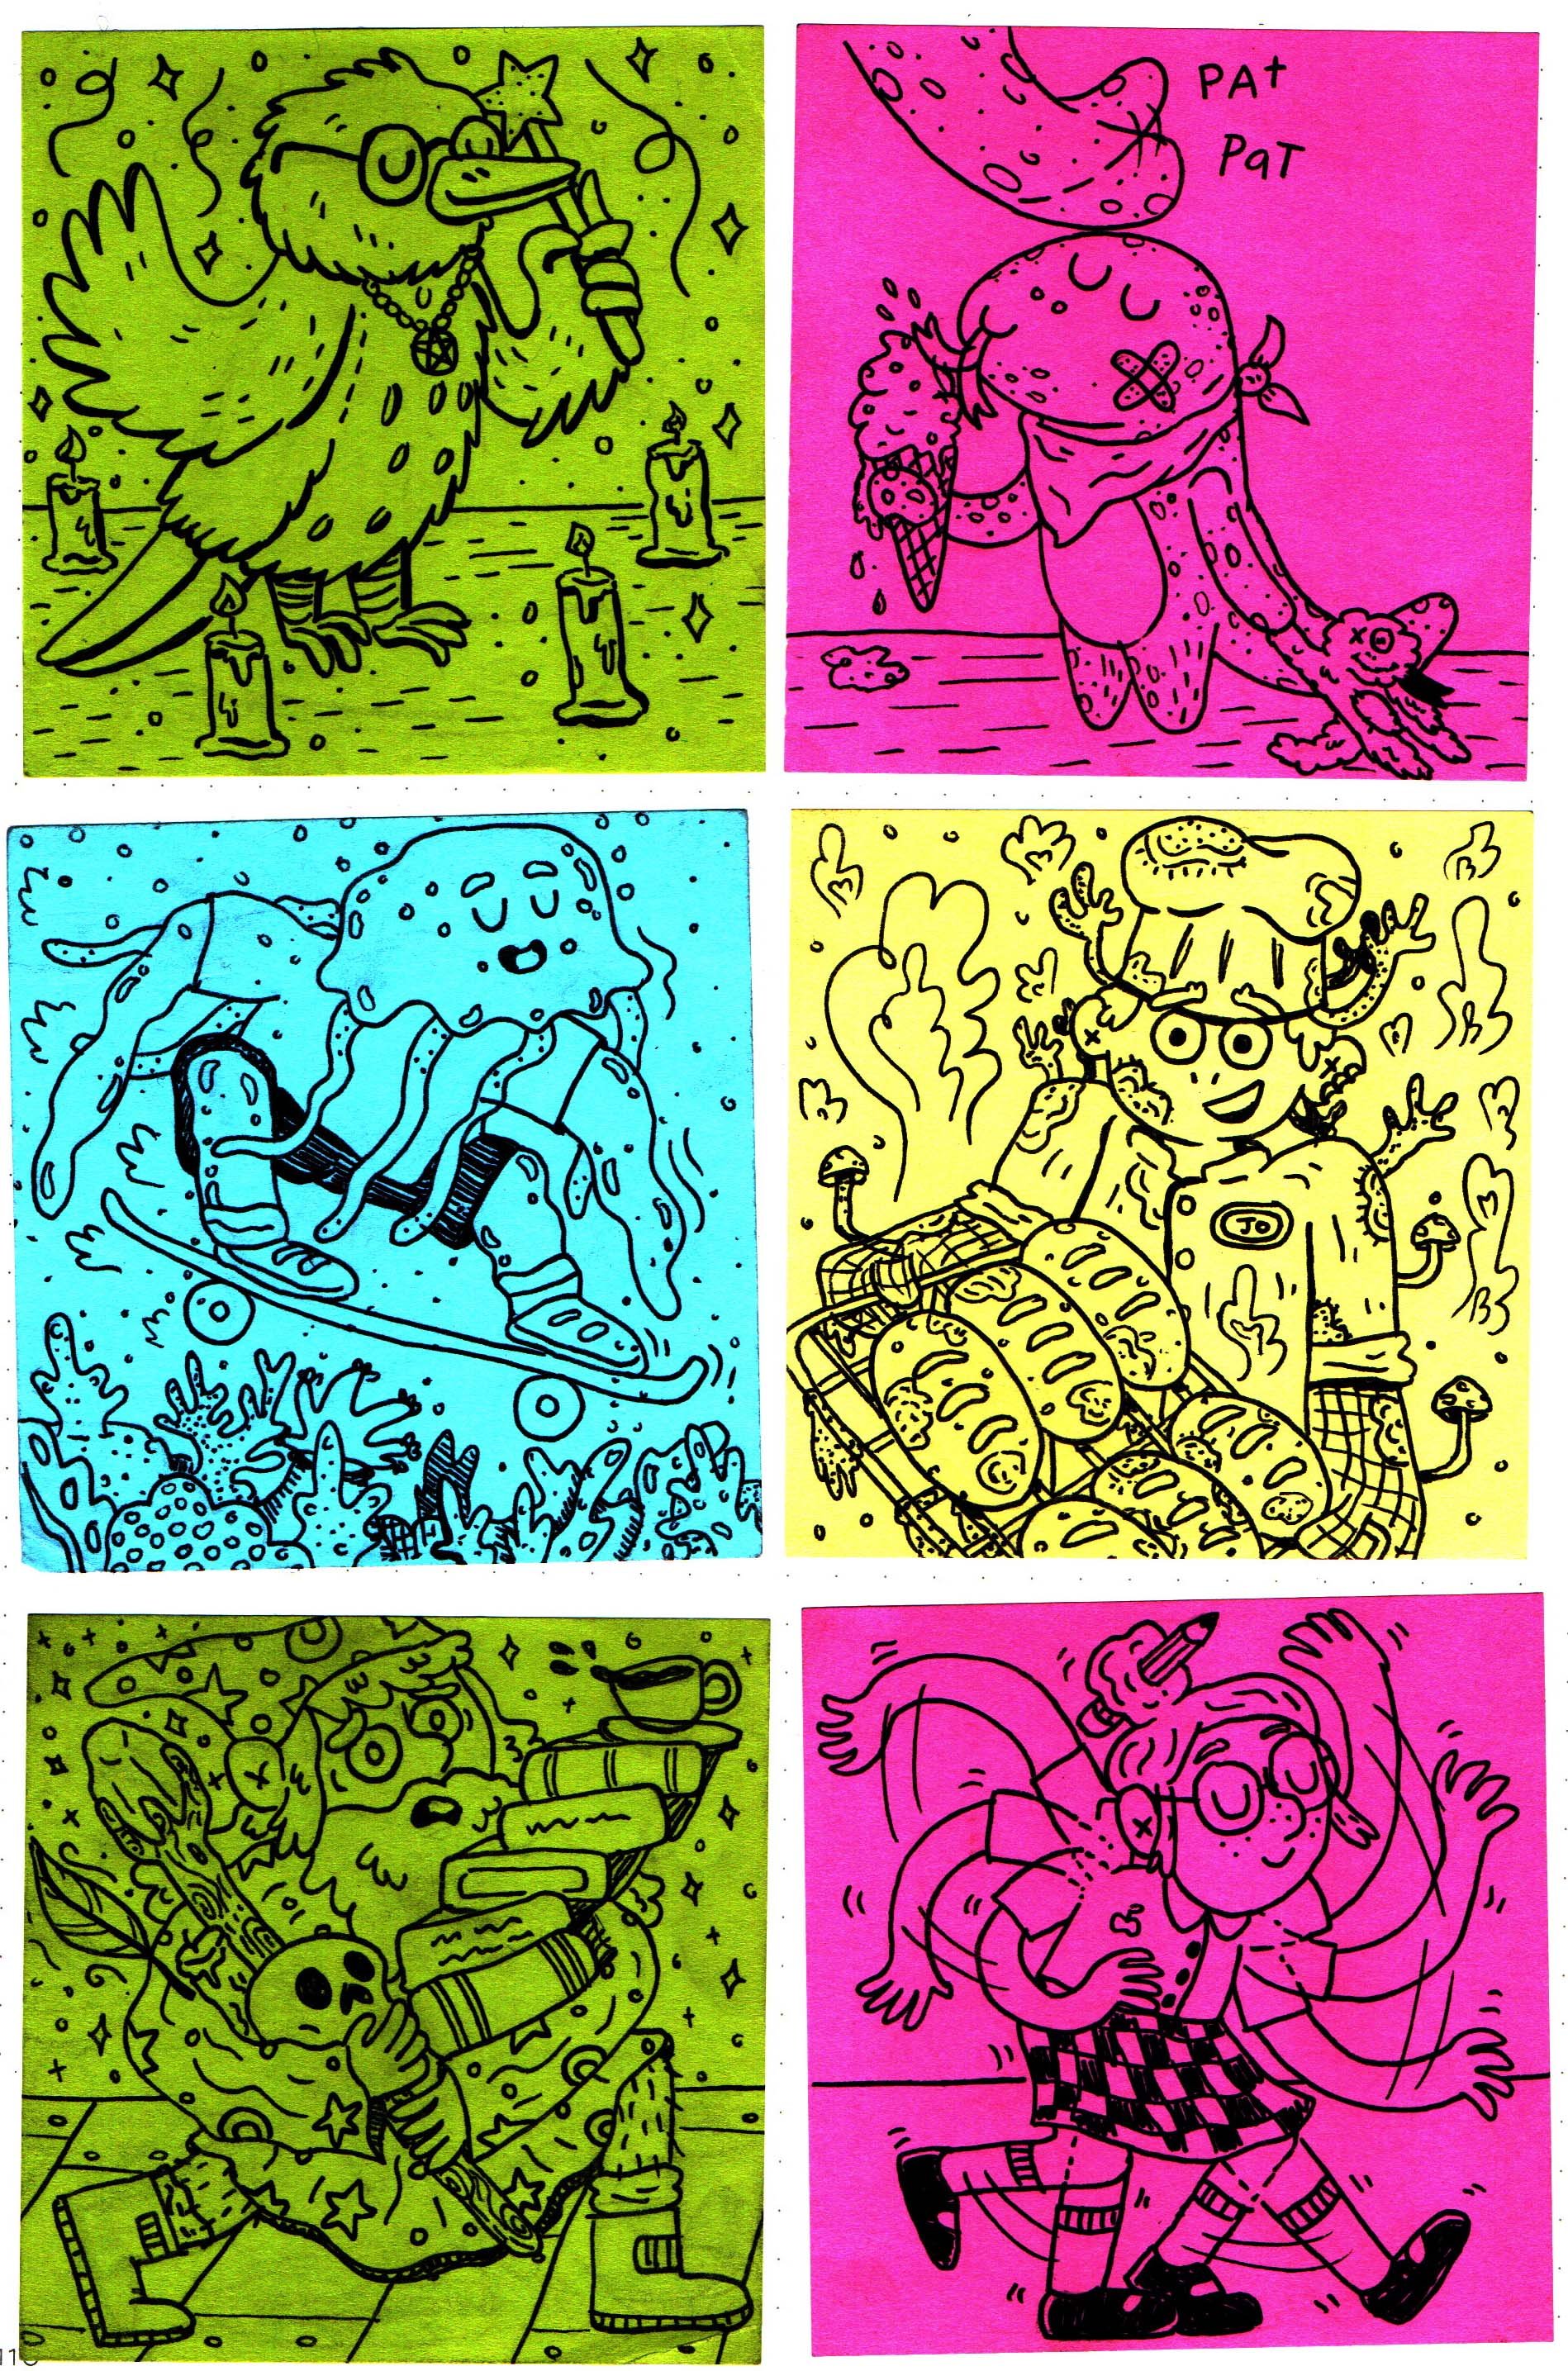
Recently I’ve been getting into the animated series Craig of the Creek (which is absolutely delightful and fast becoming a firm favourite with me - thanks Mitch for the recommendation!). The titular character, Craig, is a self-proclaimed map-boy whose goal (while adventuring with pals) is to map the Creek where all their adventures happen. Watching it has reminded me of my absolute love of maps and prompted me to share some of the maps I’ve made, including this Story Maze Map.

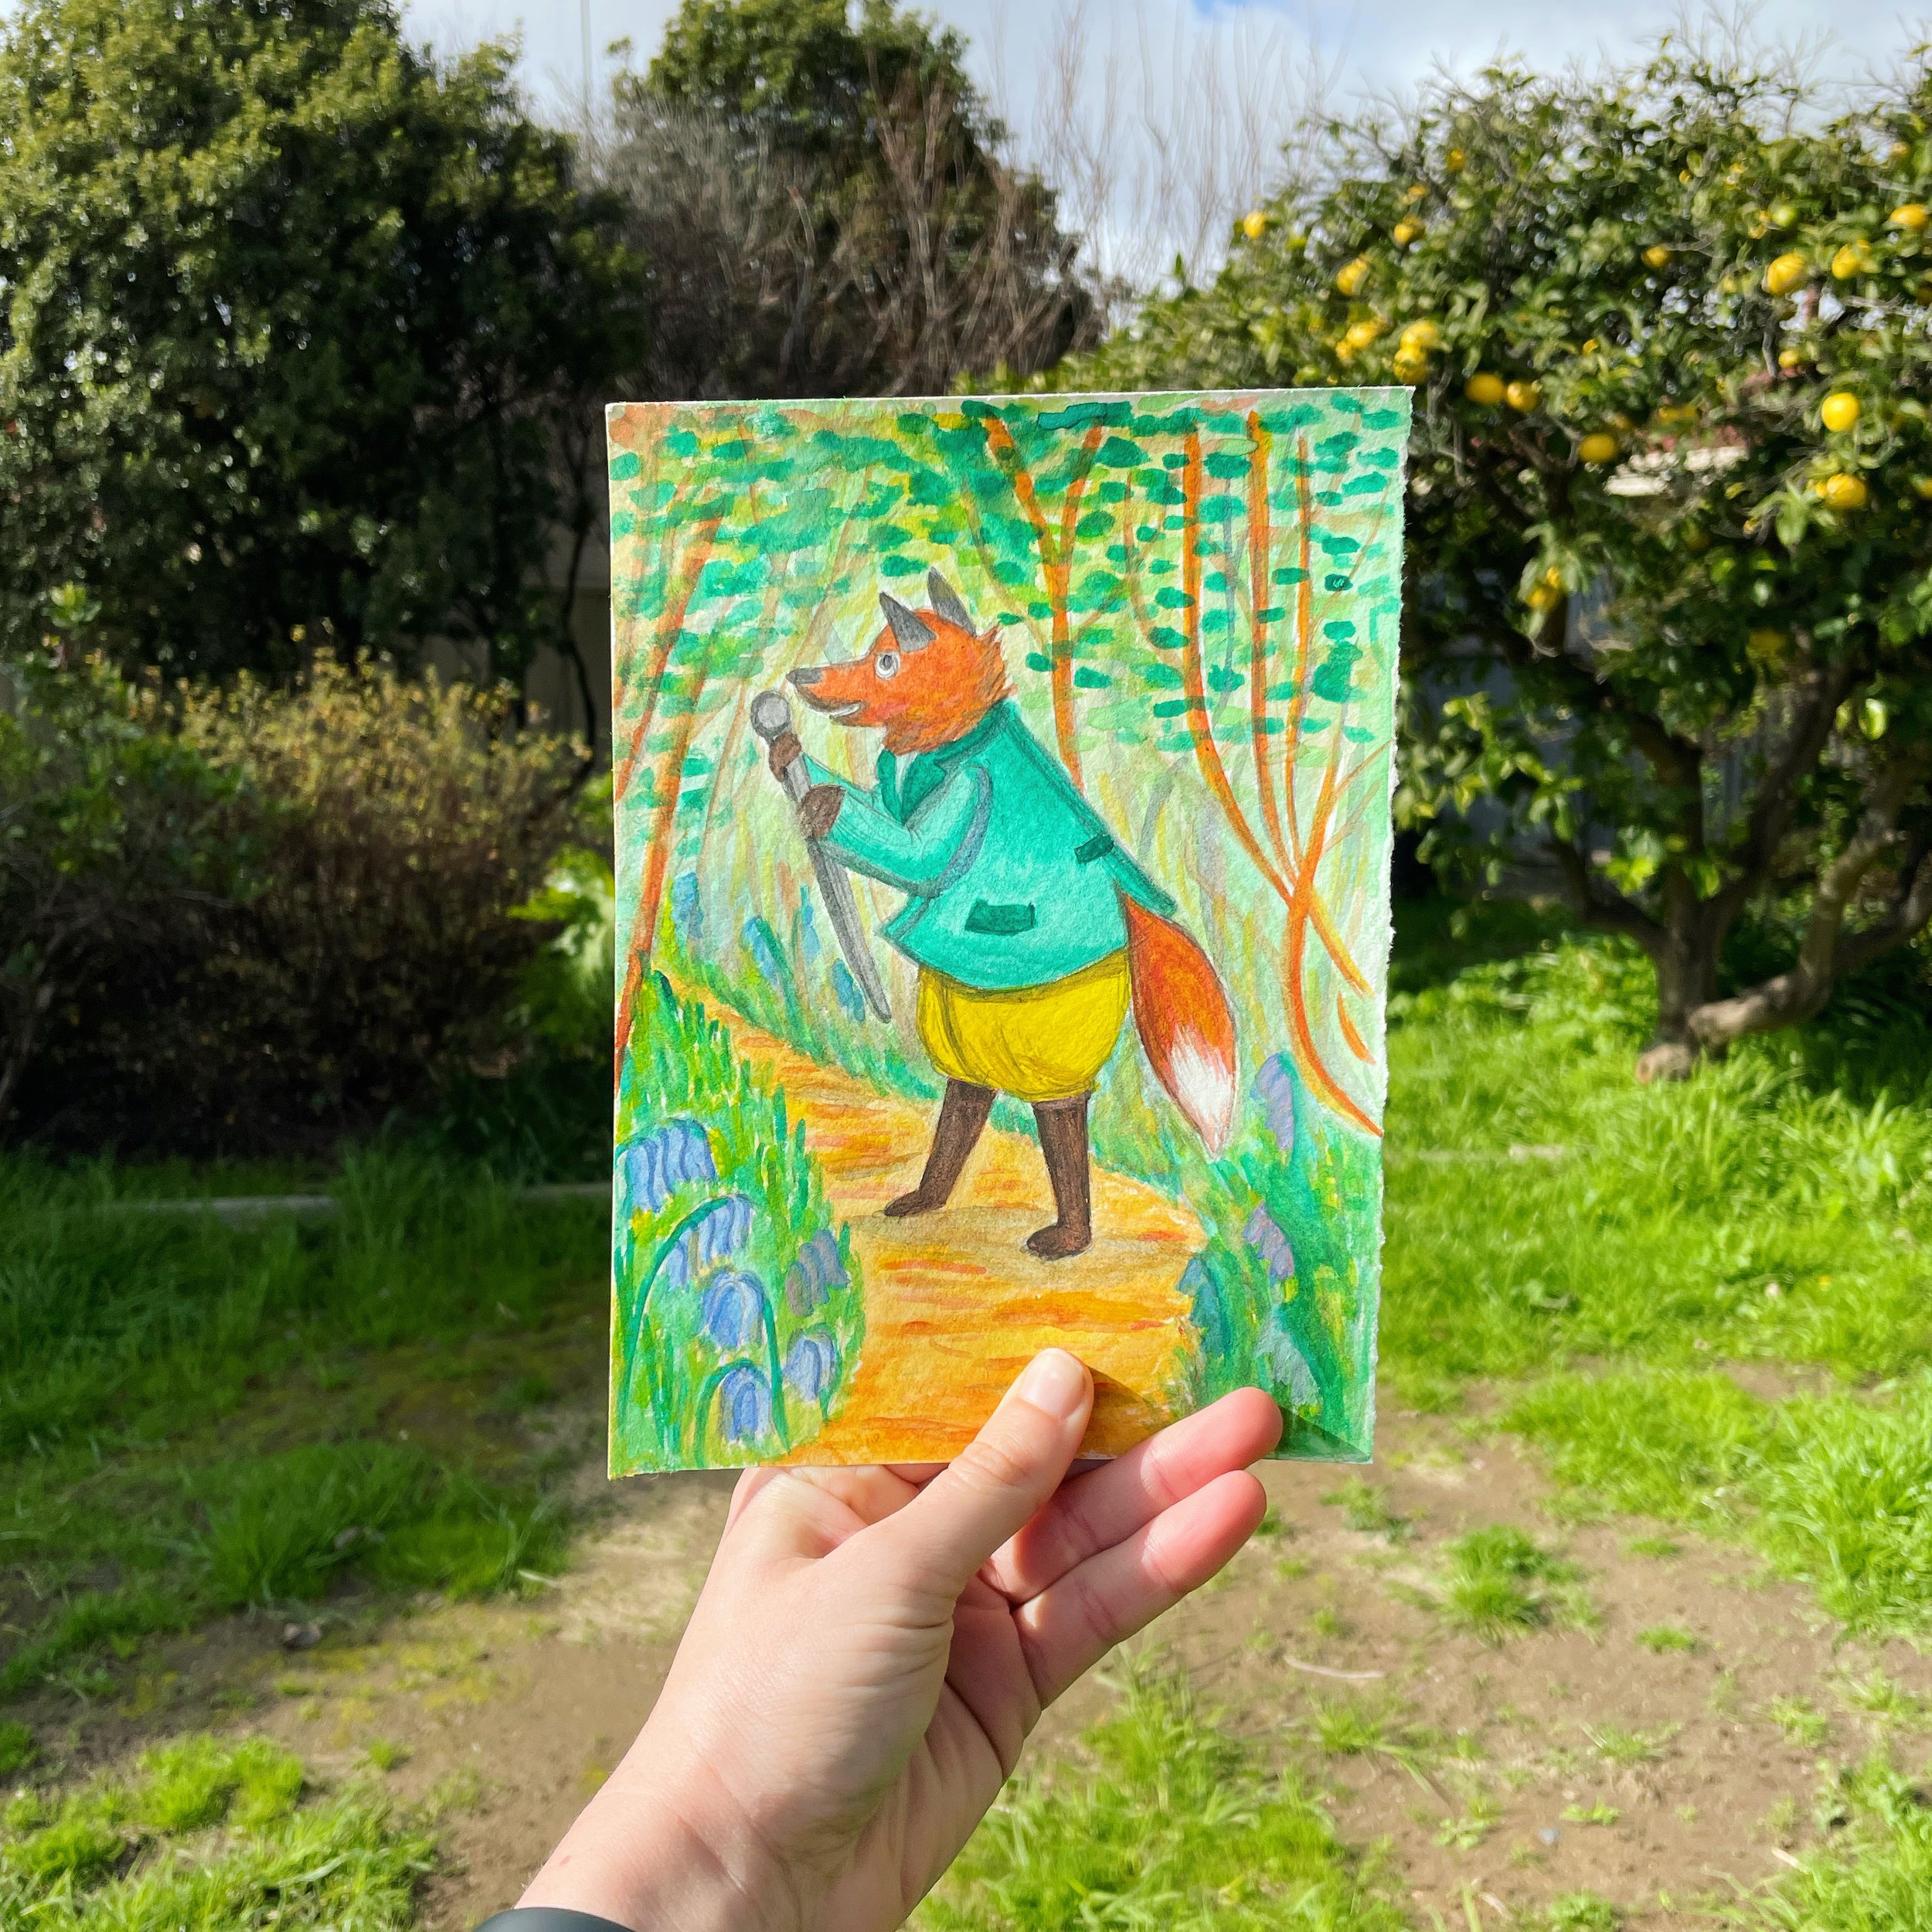
Forest Story Maze Map. The map is of a forest with a yellow sandy path. The words START HERE and a bonfire are in the middle of the forest. Throughout the forest are scattered different monsters.

This one was originally designed for an issue of Pigeon Post (a quarterly publication by 100 Story Building, a centre for young writers). You start in the middle of the forest and choose a path to follow. Throughout the forest are scattered different monsters, events or items and when you come across one of these you need to incorporate them into the story you’re telling.

E.g. It was a bright sunny day and we were in the middle of a lush green forest. The trees were so tall and the canopy was so thick that you could barely see the sky. We couldn’t at all remember how we got here.
“We have to get home!” Sophie said. “It’s almost tea-time! I can’t miss dessert. Not again.”
We all agreed: missing dessert was not acceptable.
“I have a good feeling about the path to the left,” I said.
“I think right is the right way,” said Tom.
“Split the difference?” asked Carsen.
It was settled; we would go down the middle path. A short way into our journey there was a sharp turn which opened into a small clearing where we saw a large black cauldron bubbling over with something sticky, pink and incredibly smelly.

I’d love to do more of these Story Maze Maps. Or just more maps in general. Is it really a story if it doesn’t have a map?

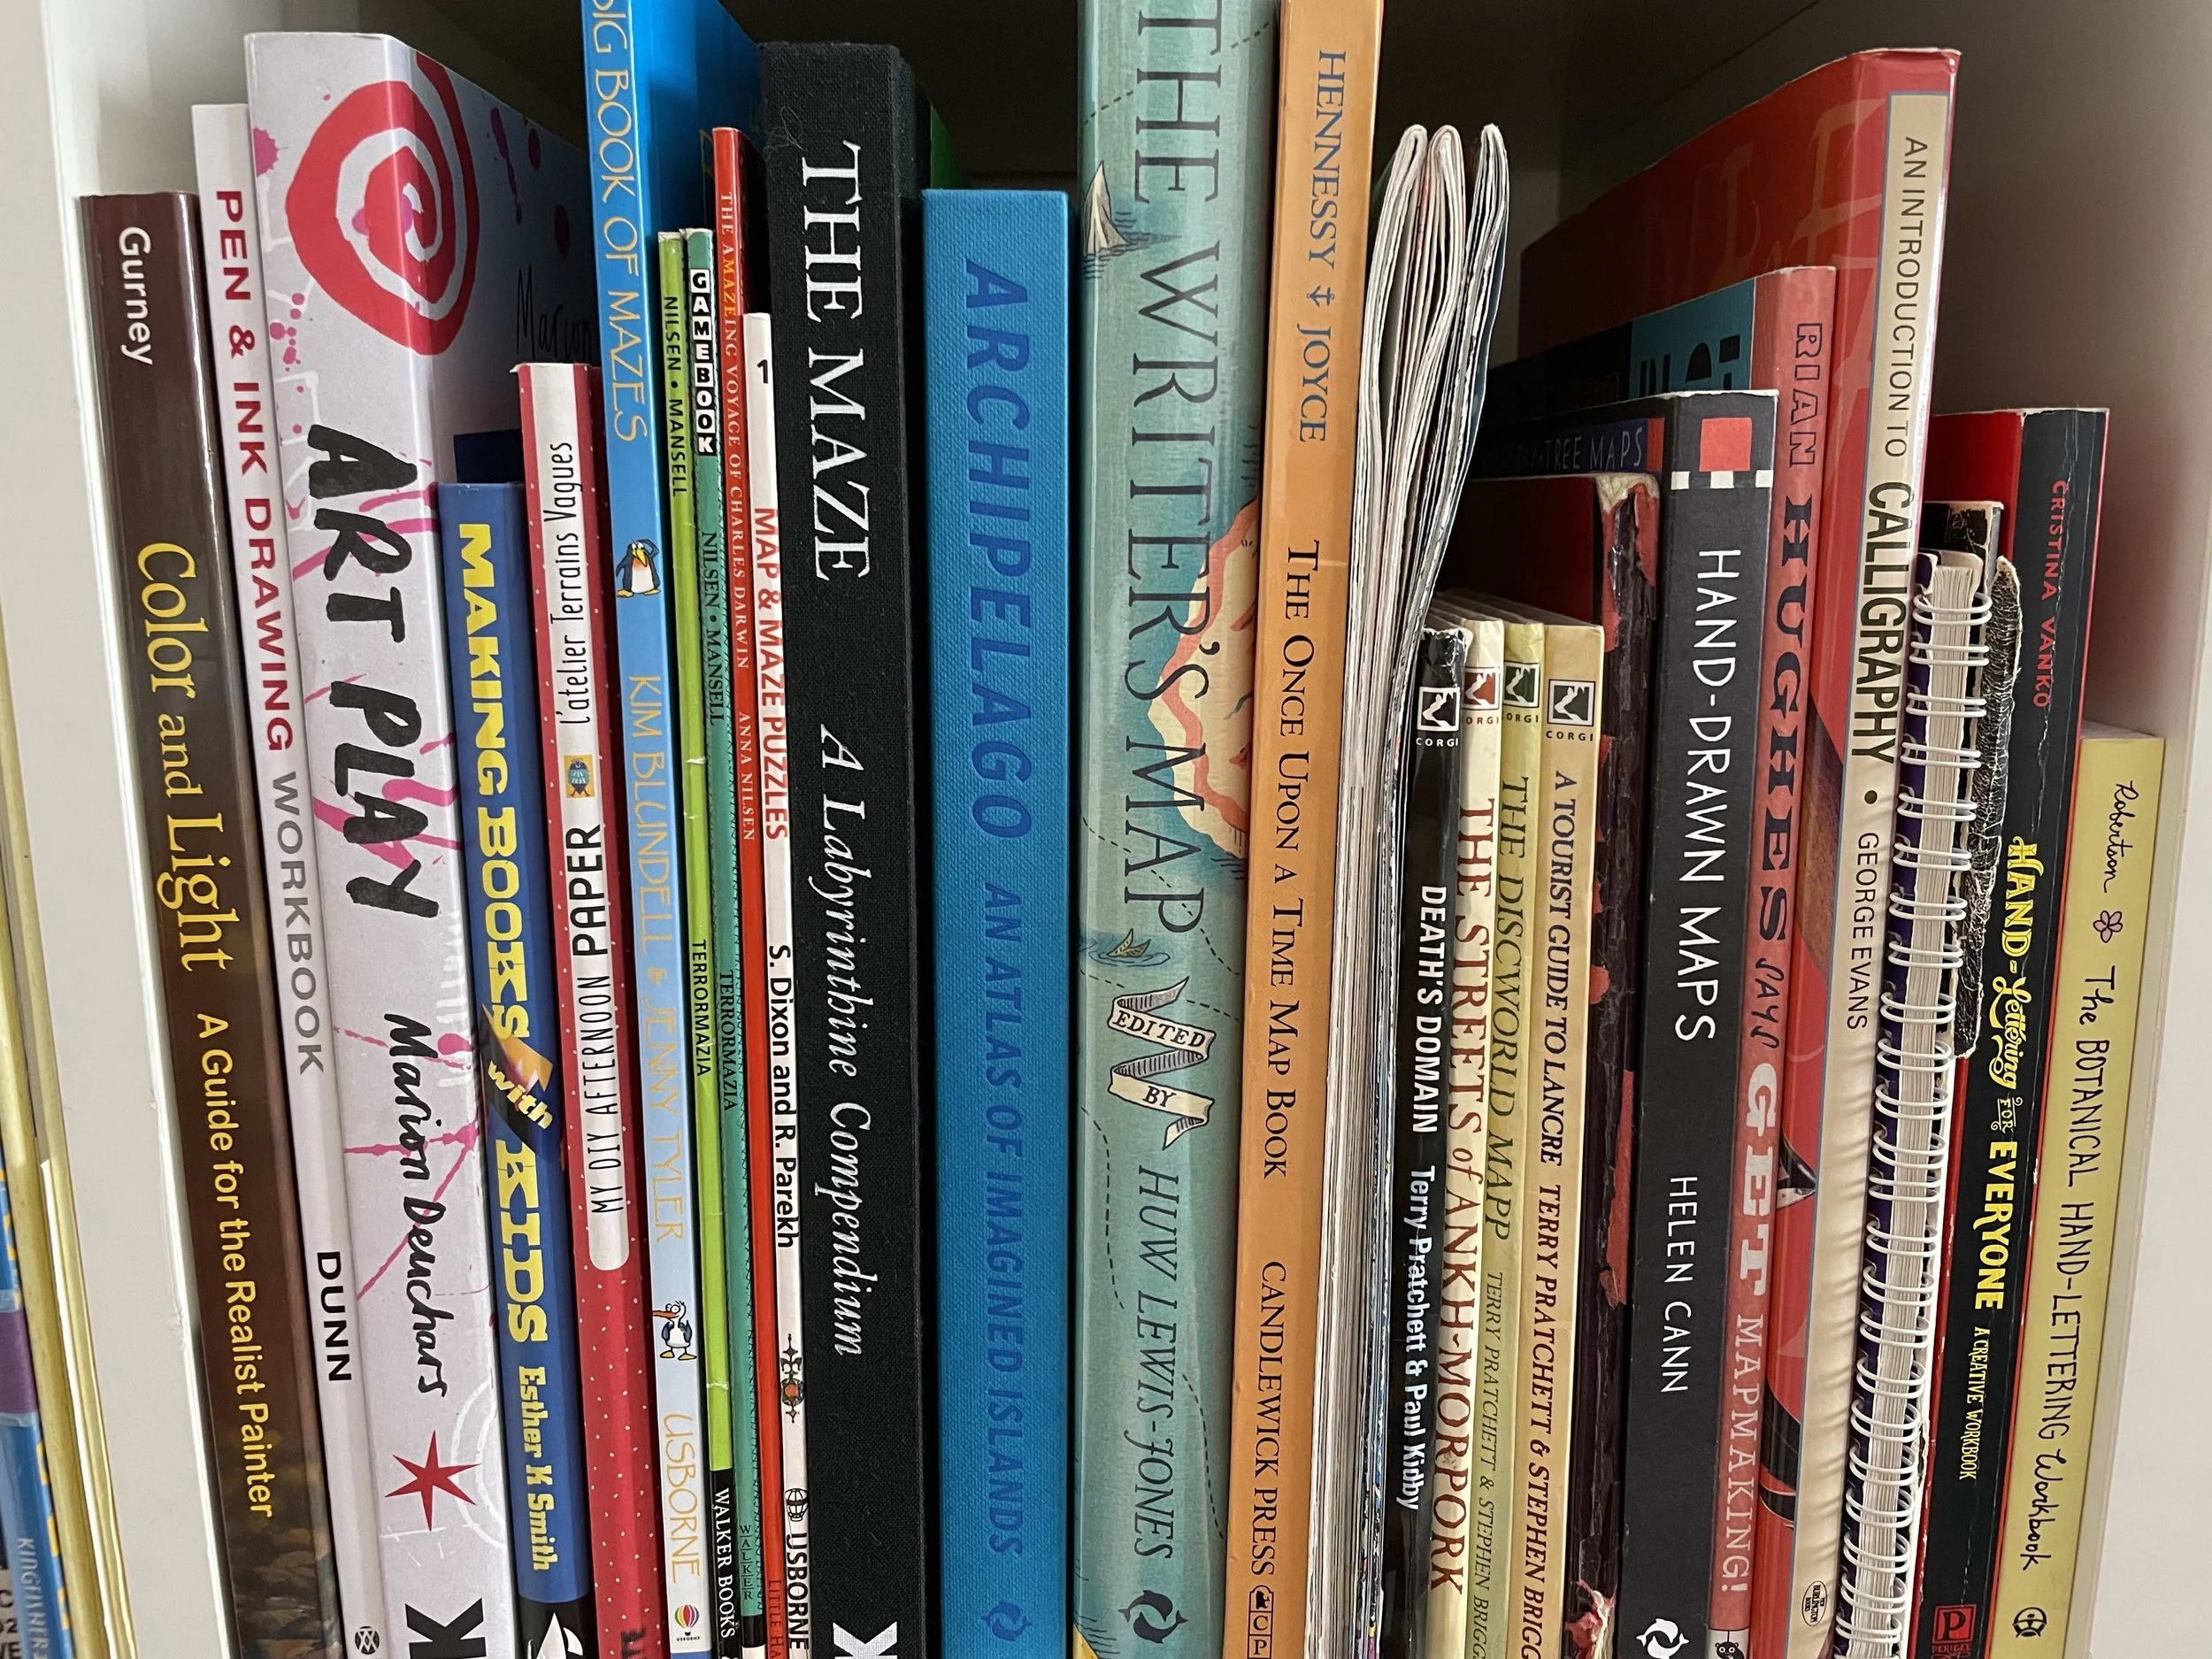
A small section of my collection of maze & map making books.

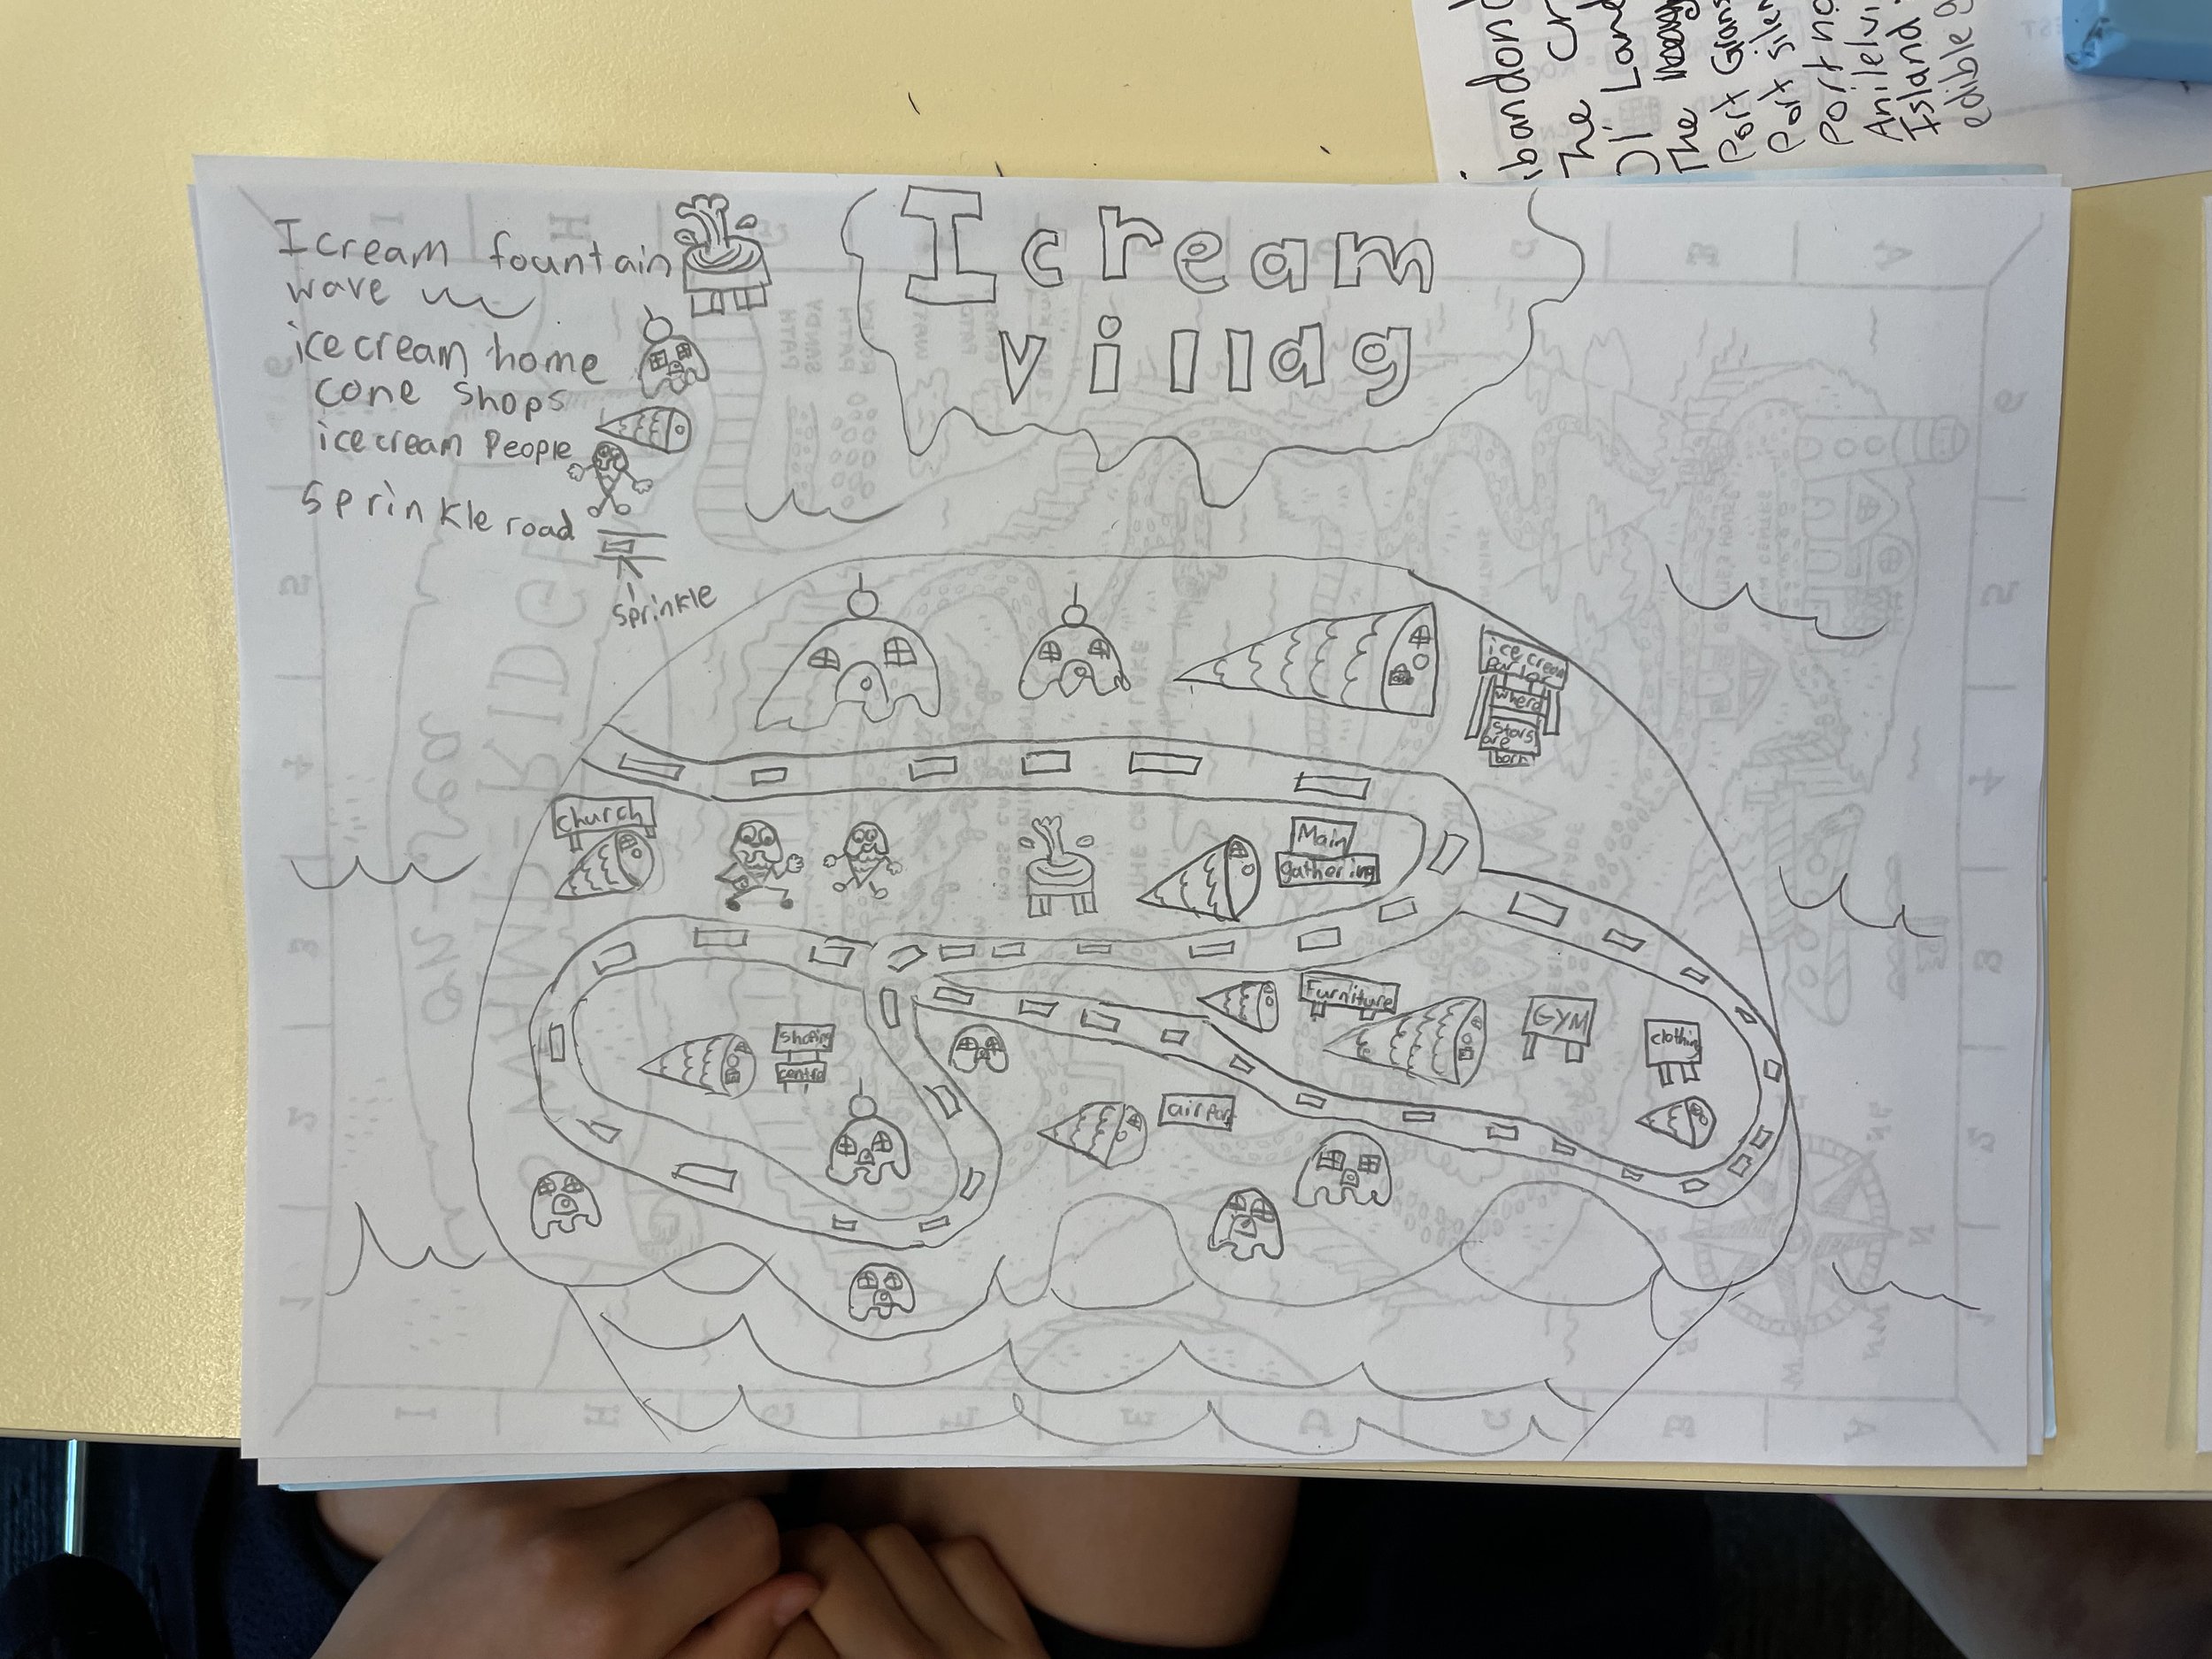
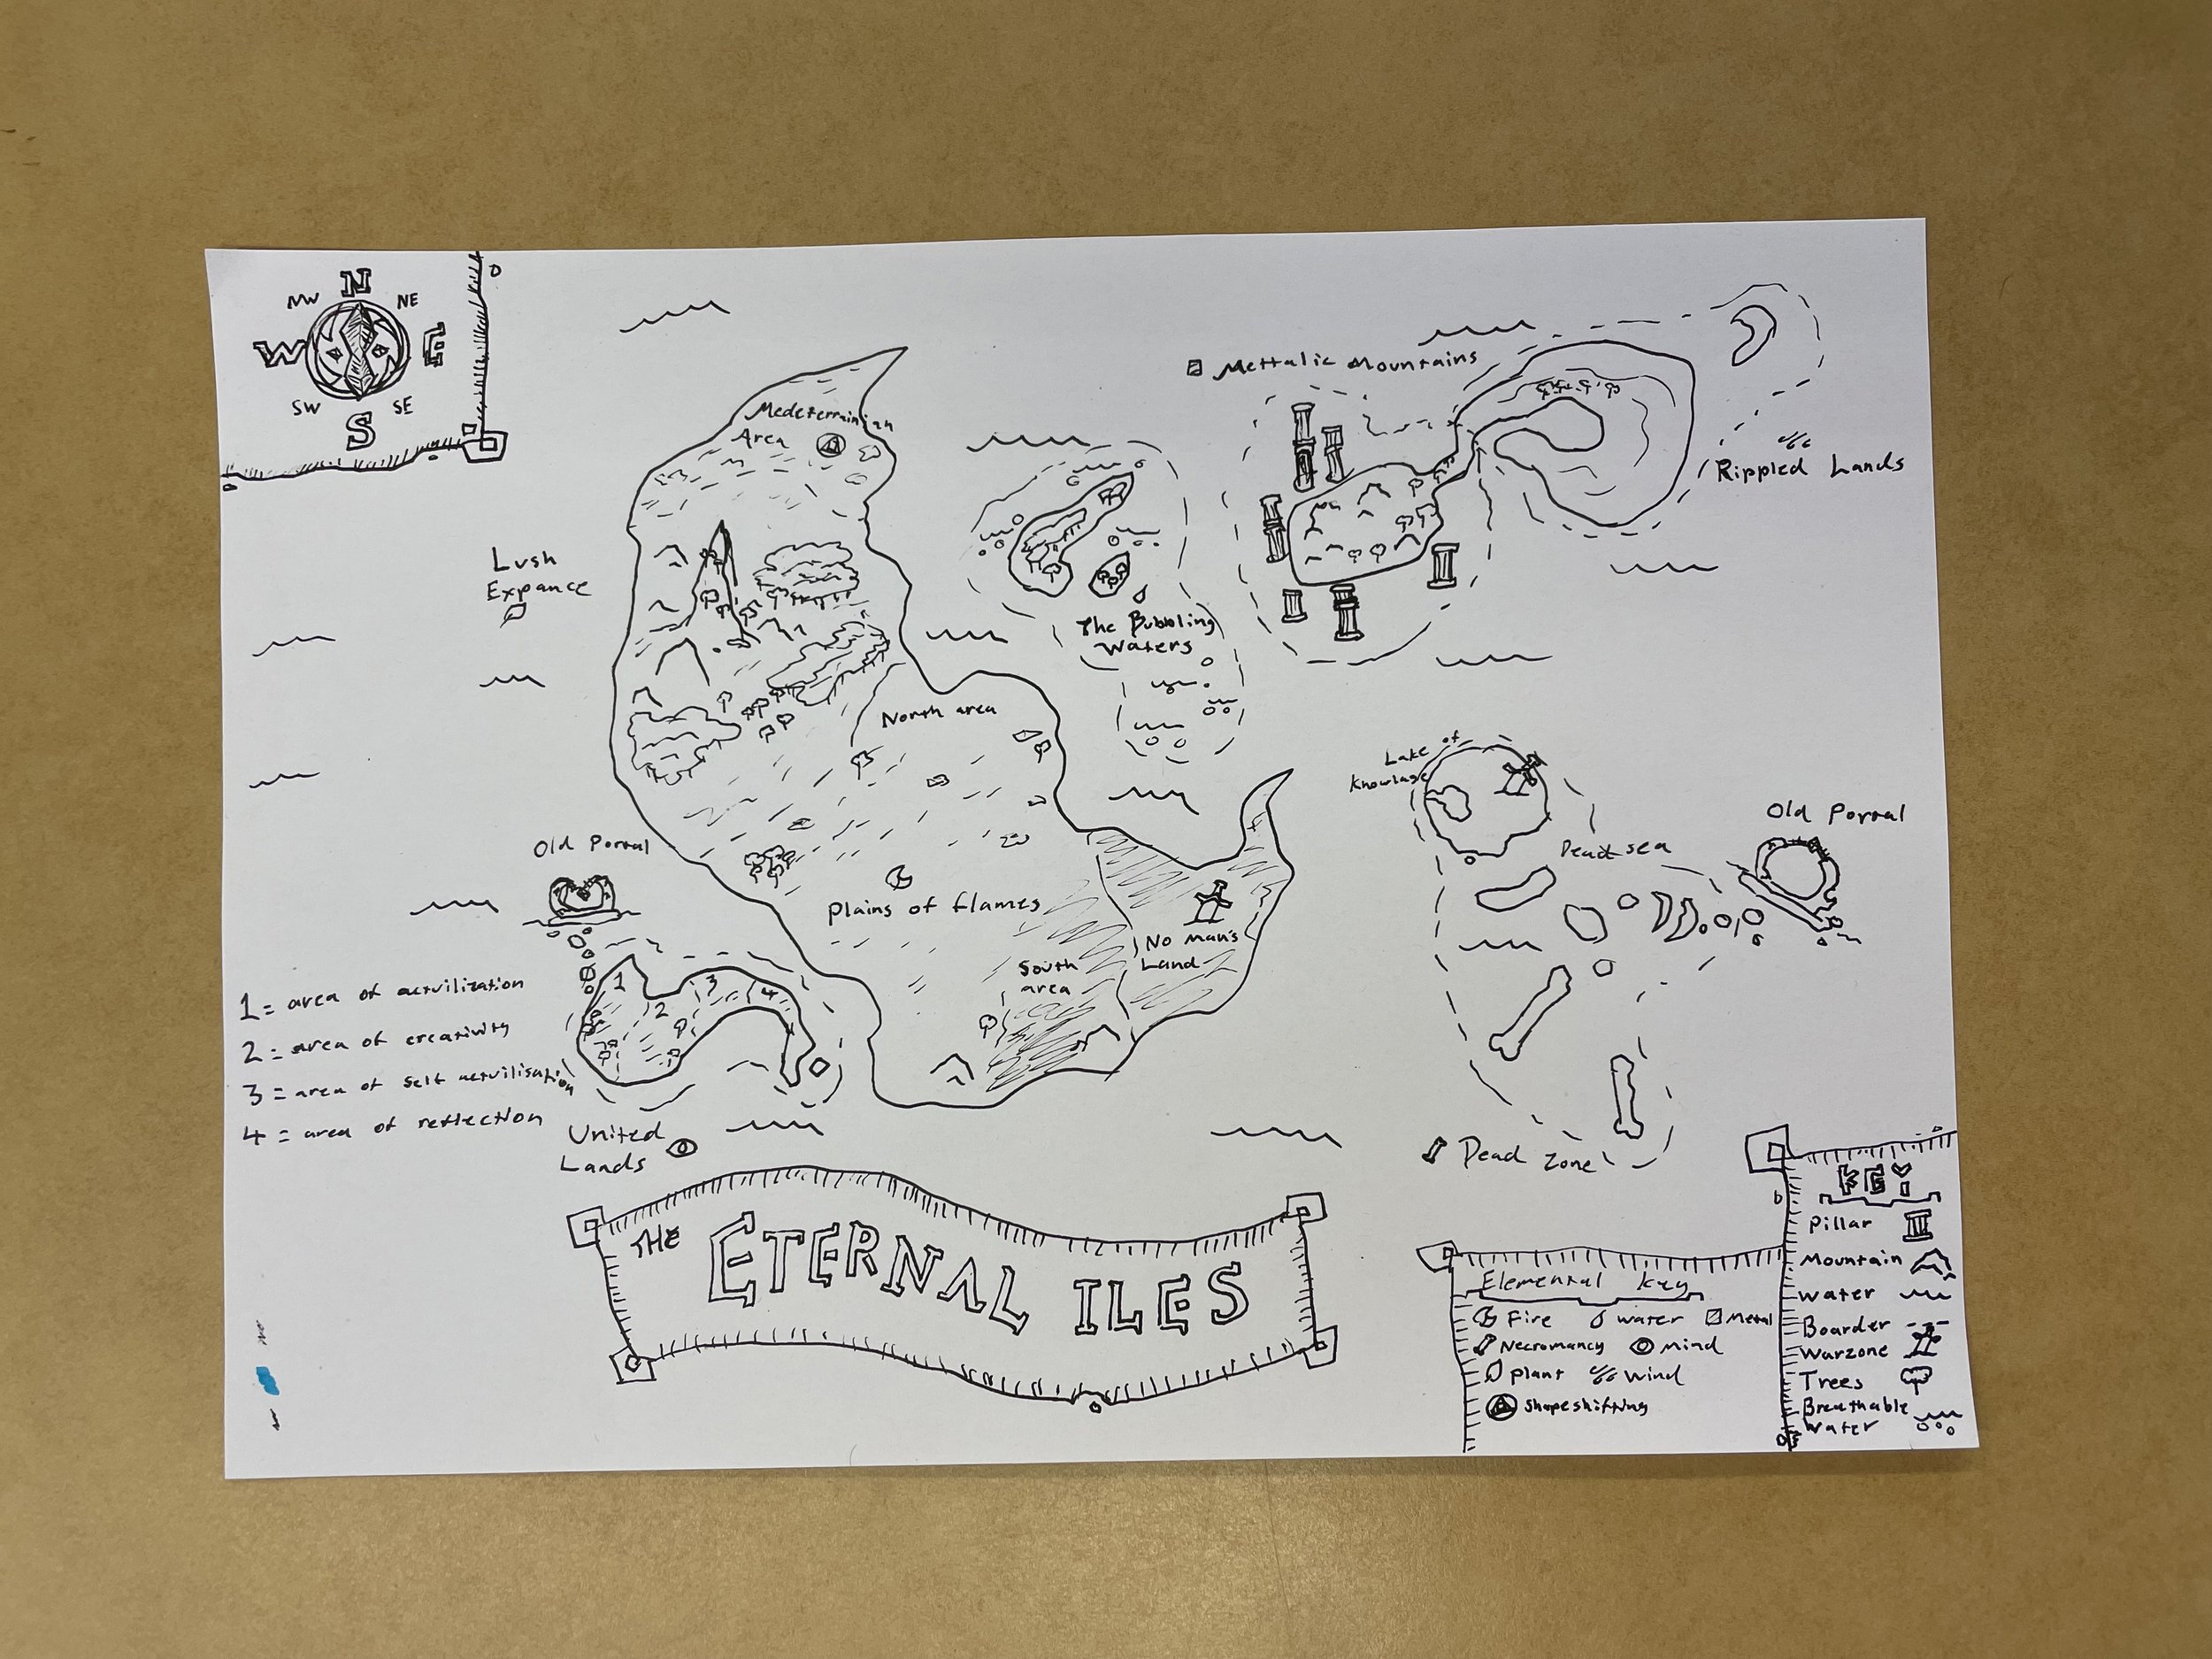
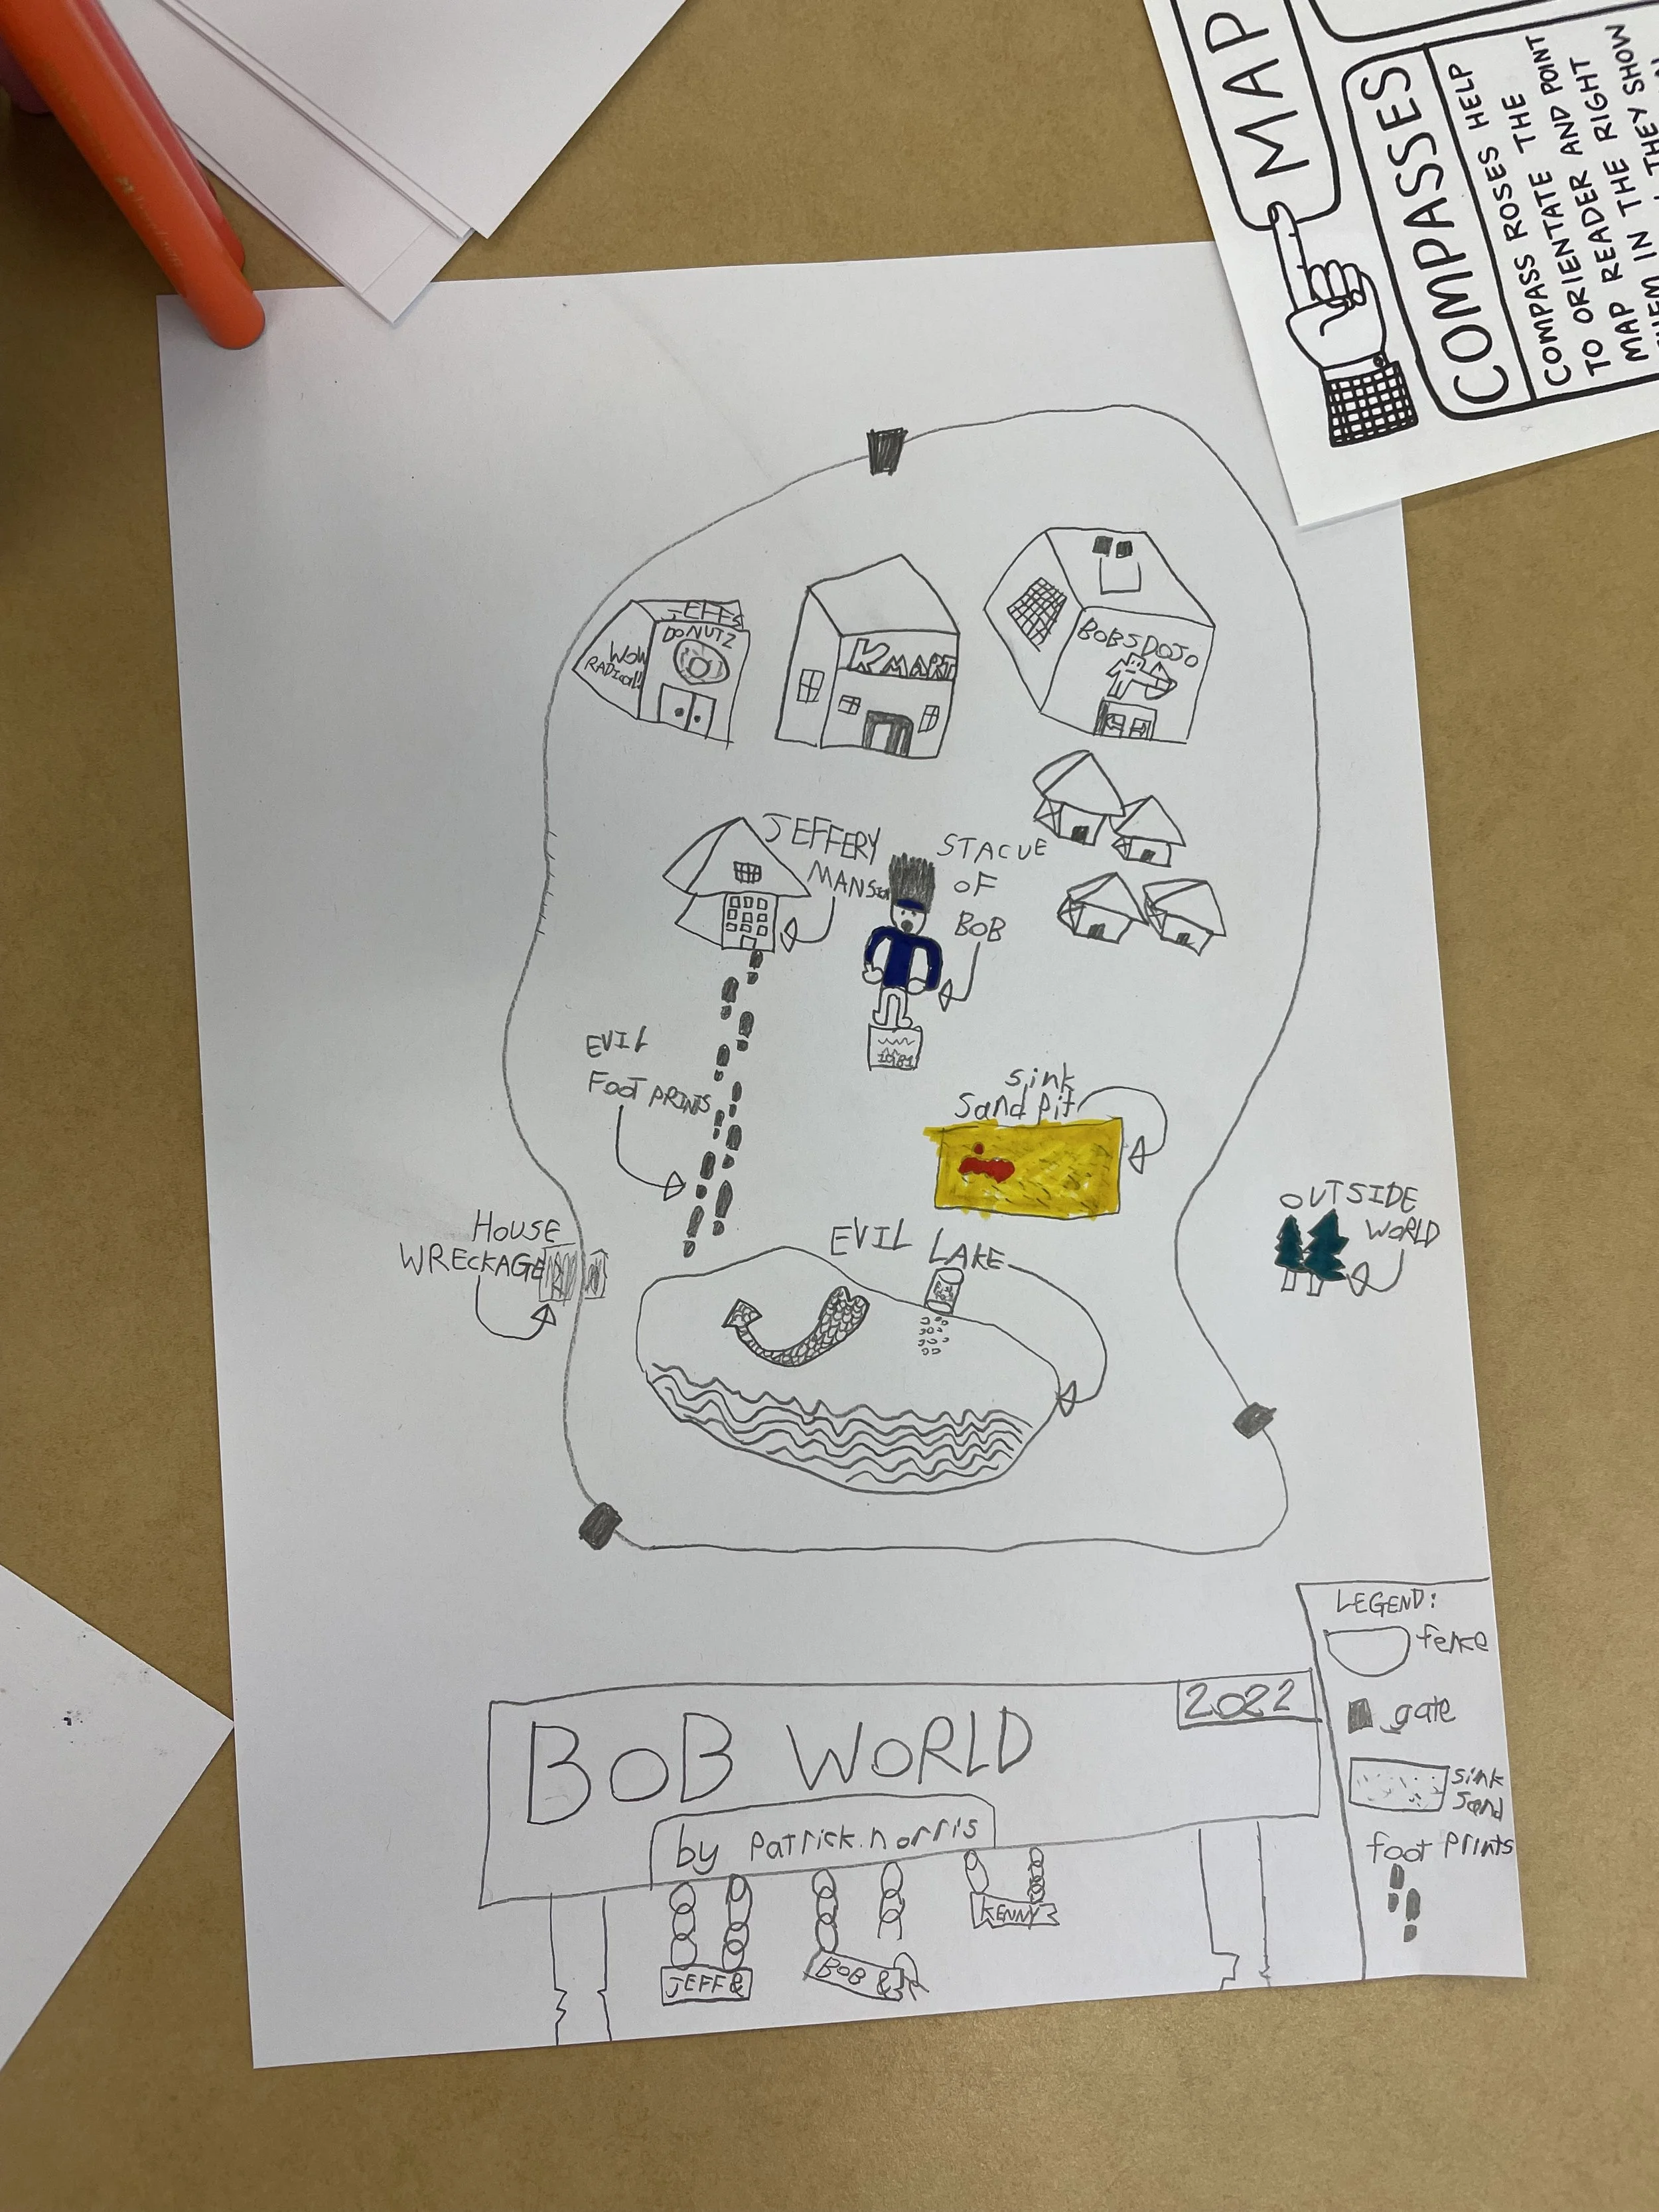
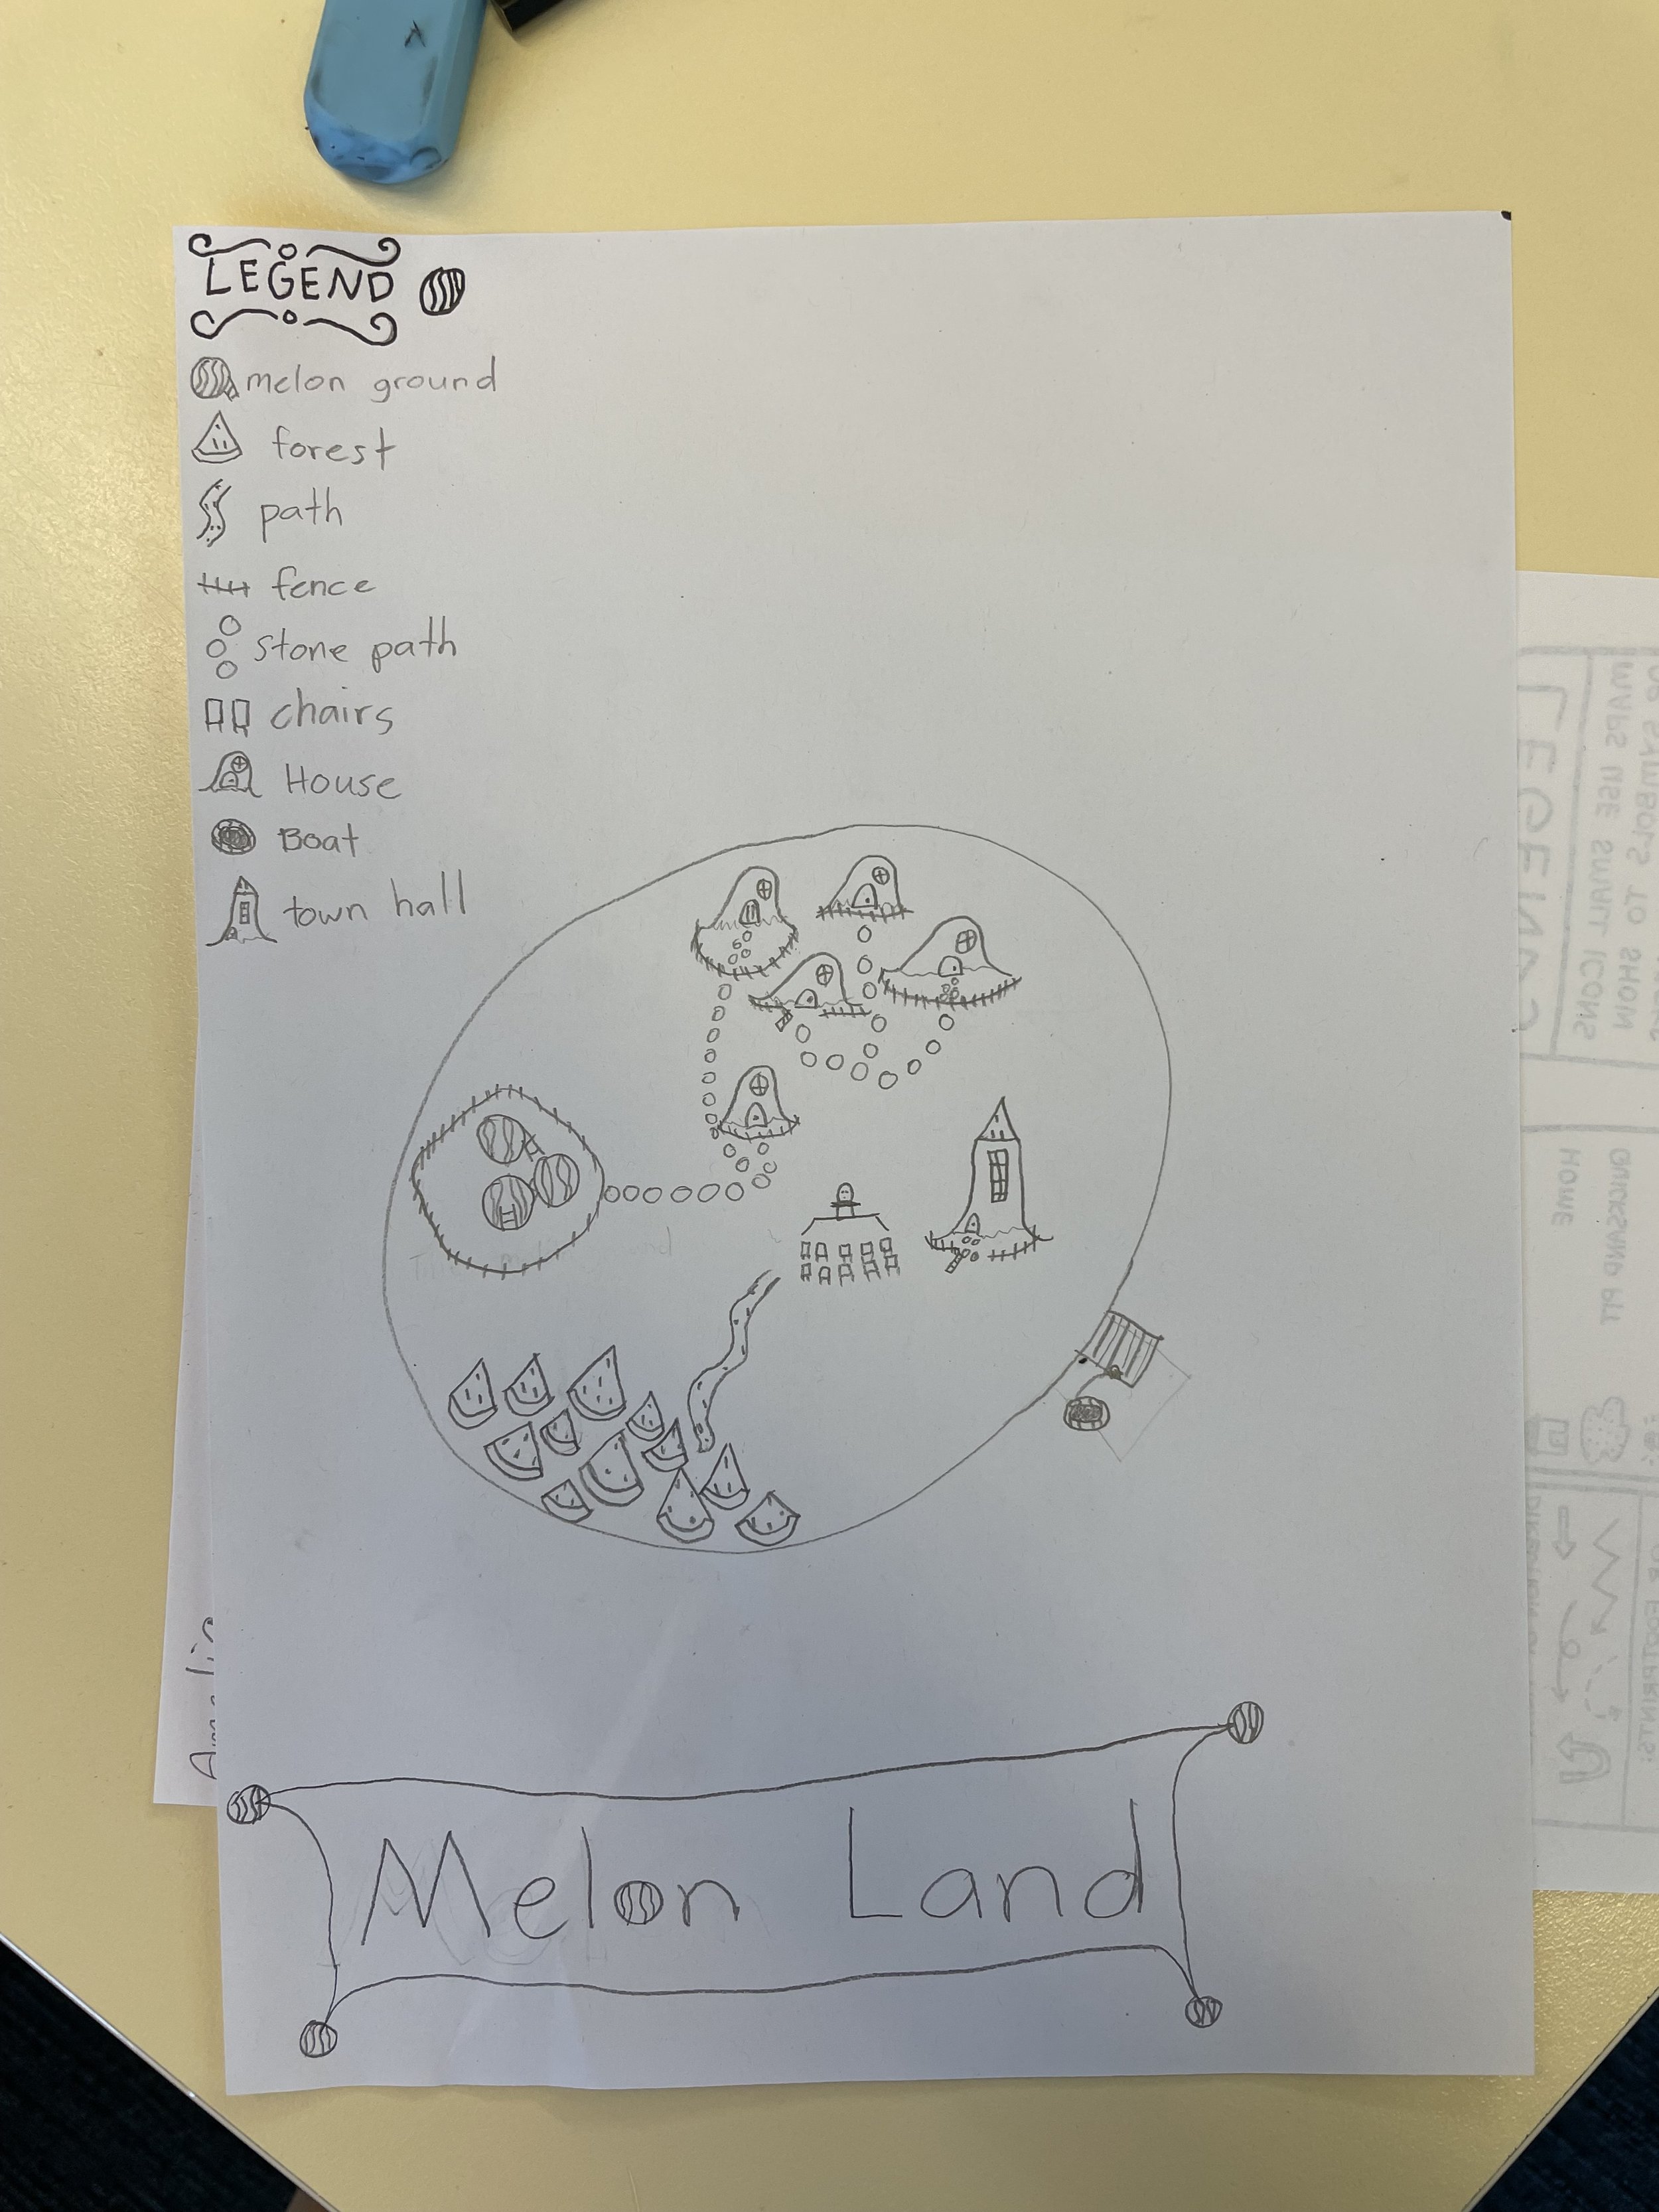
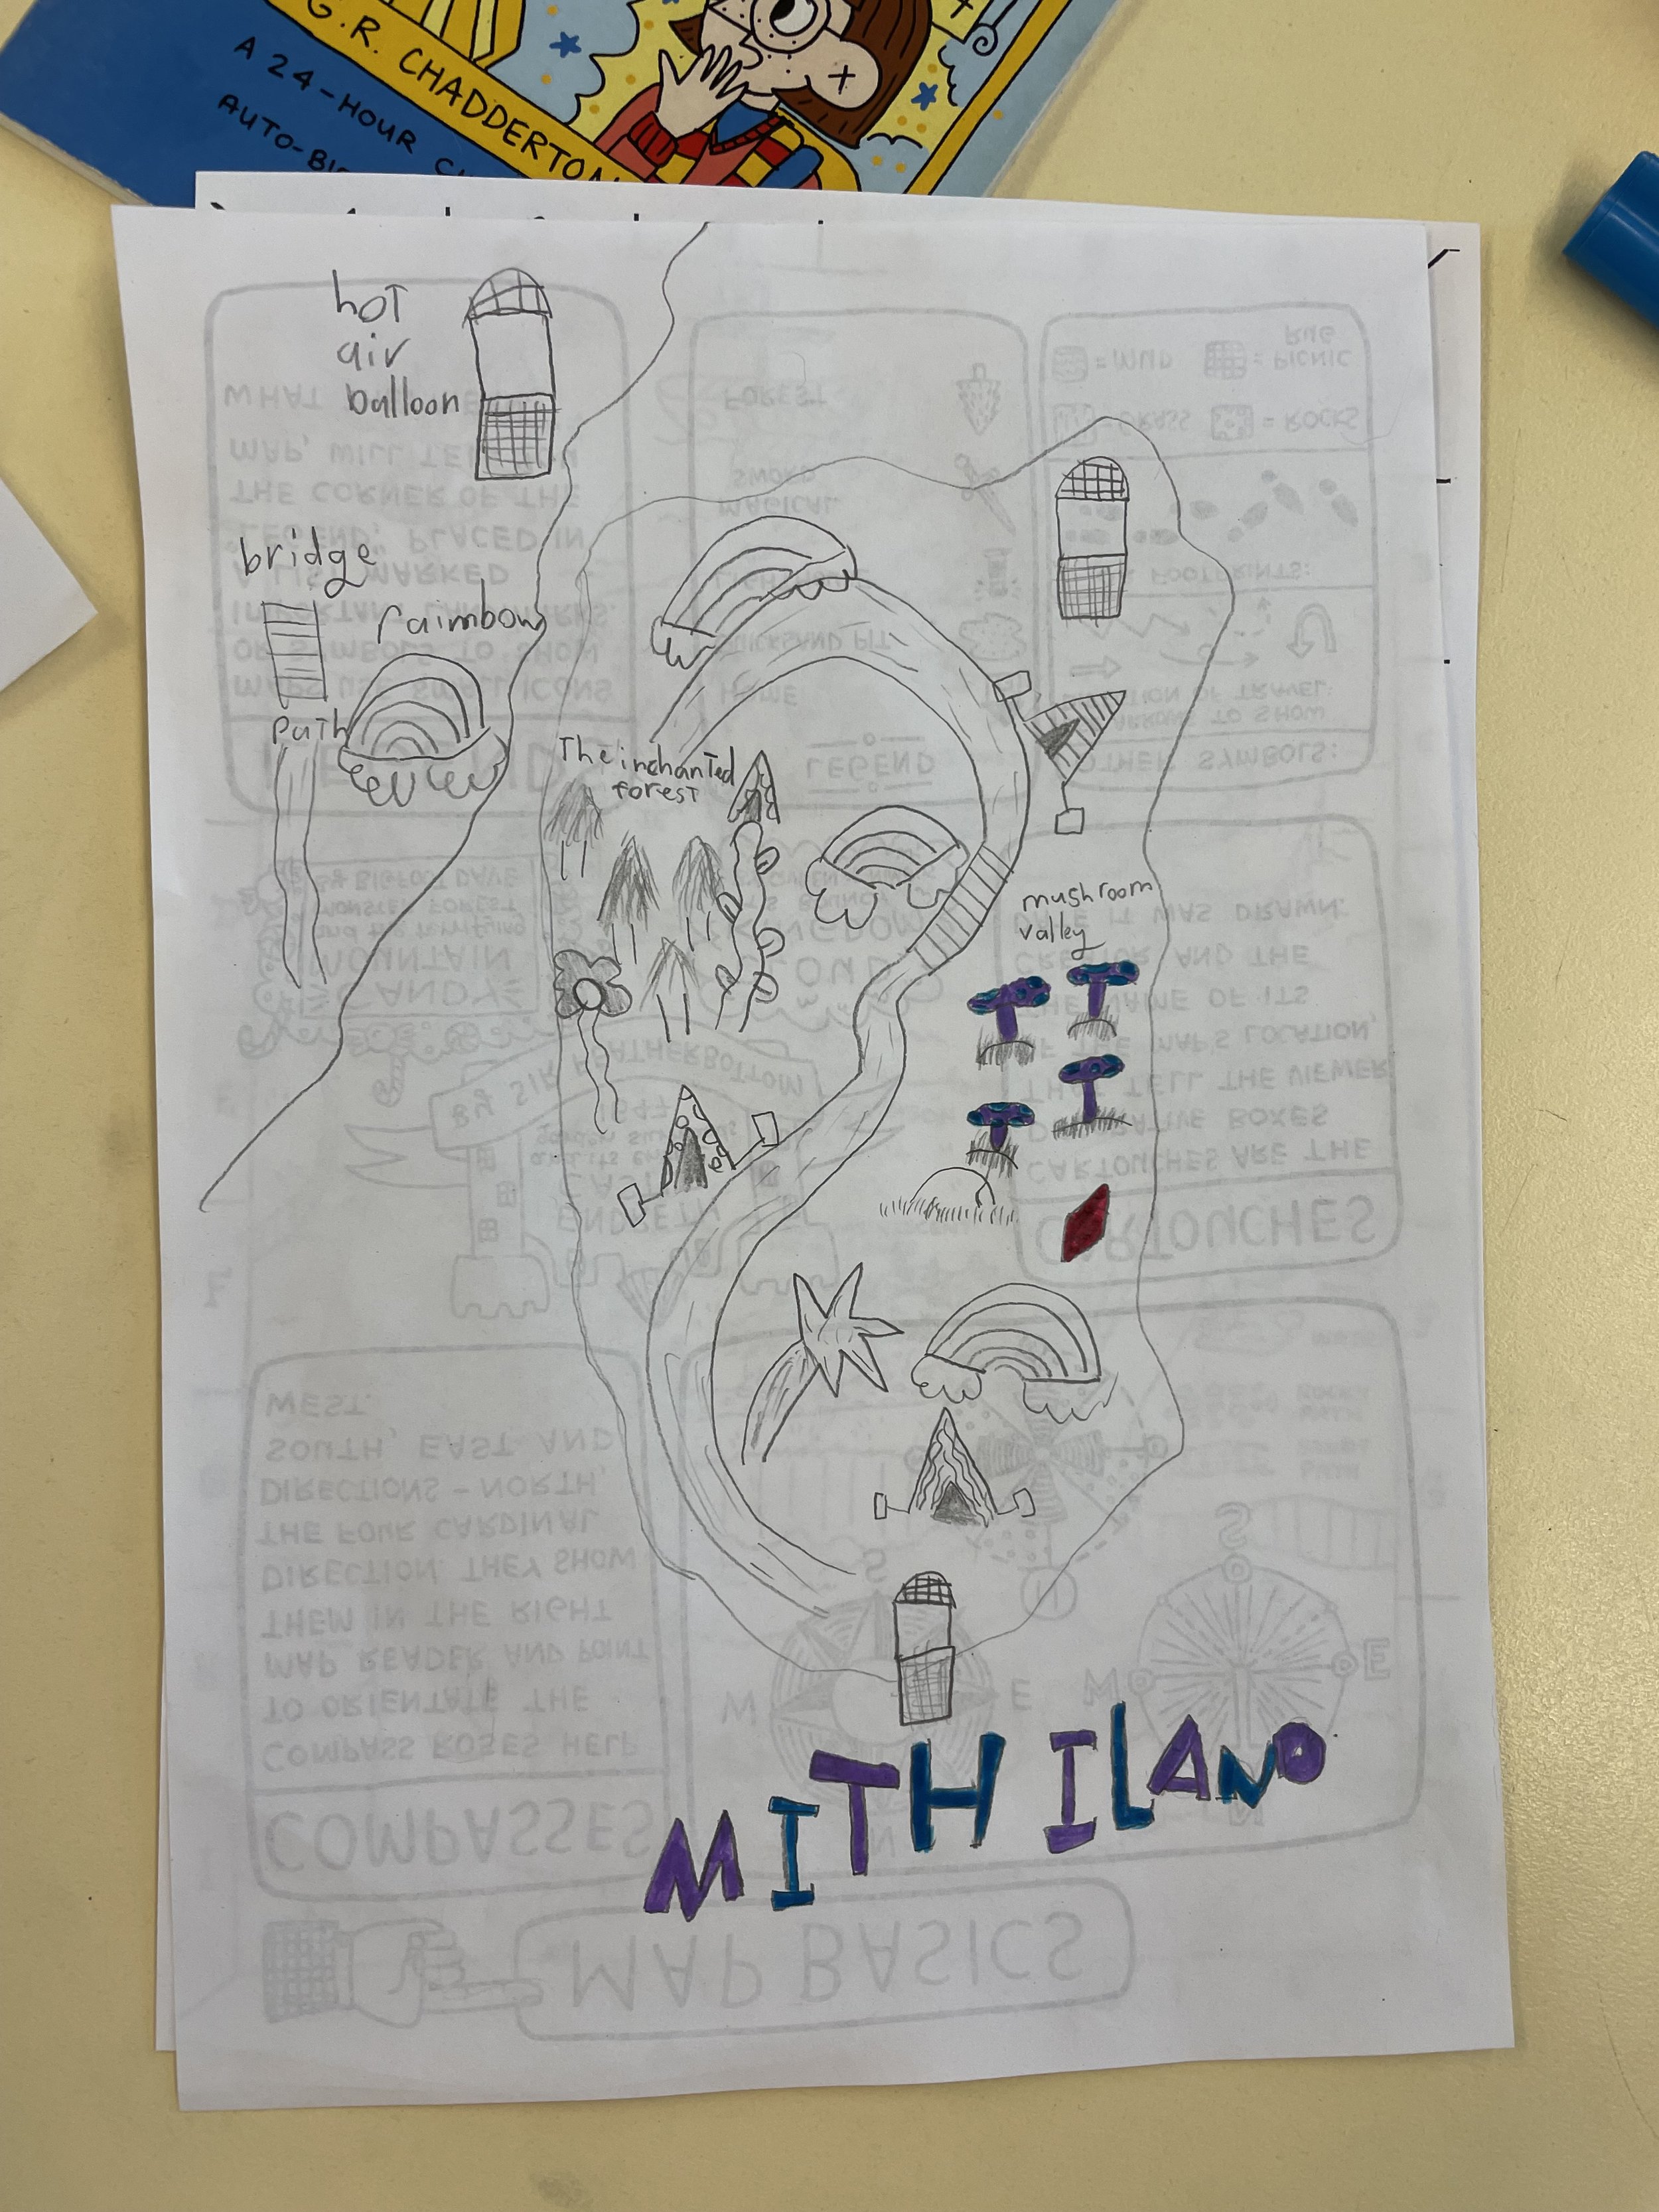
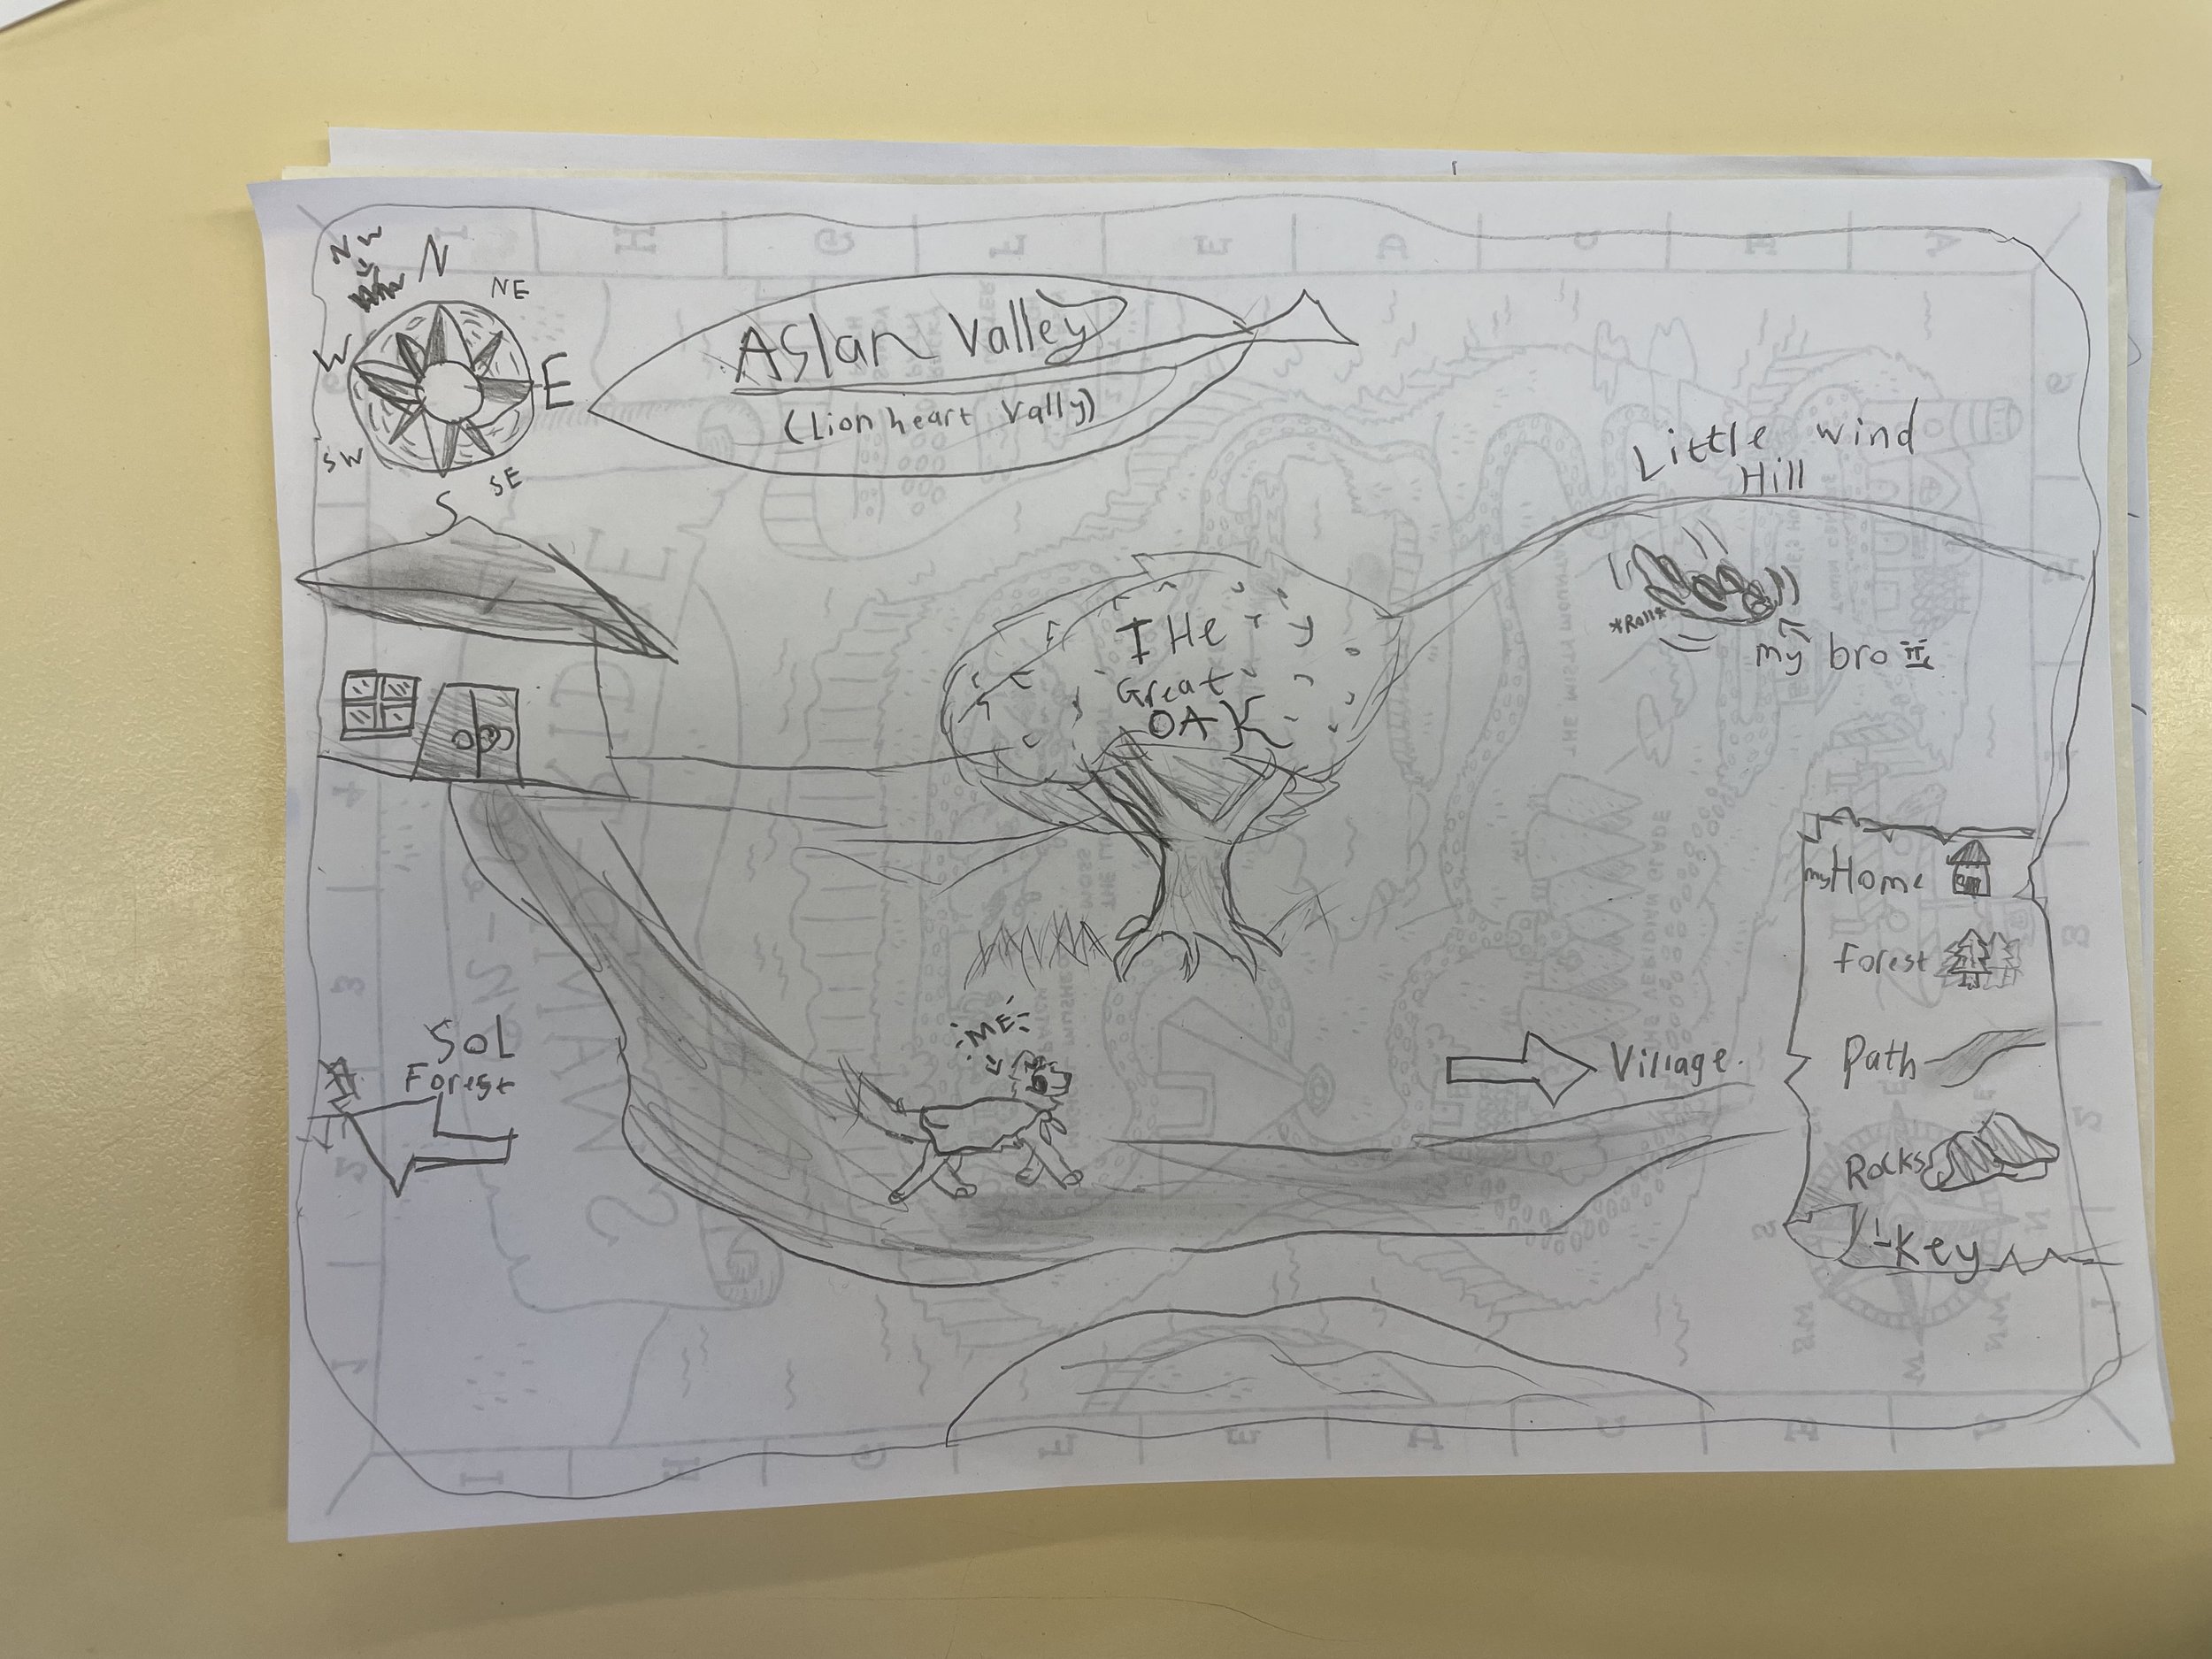
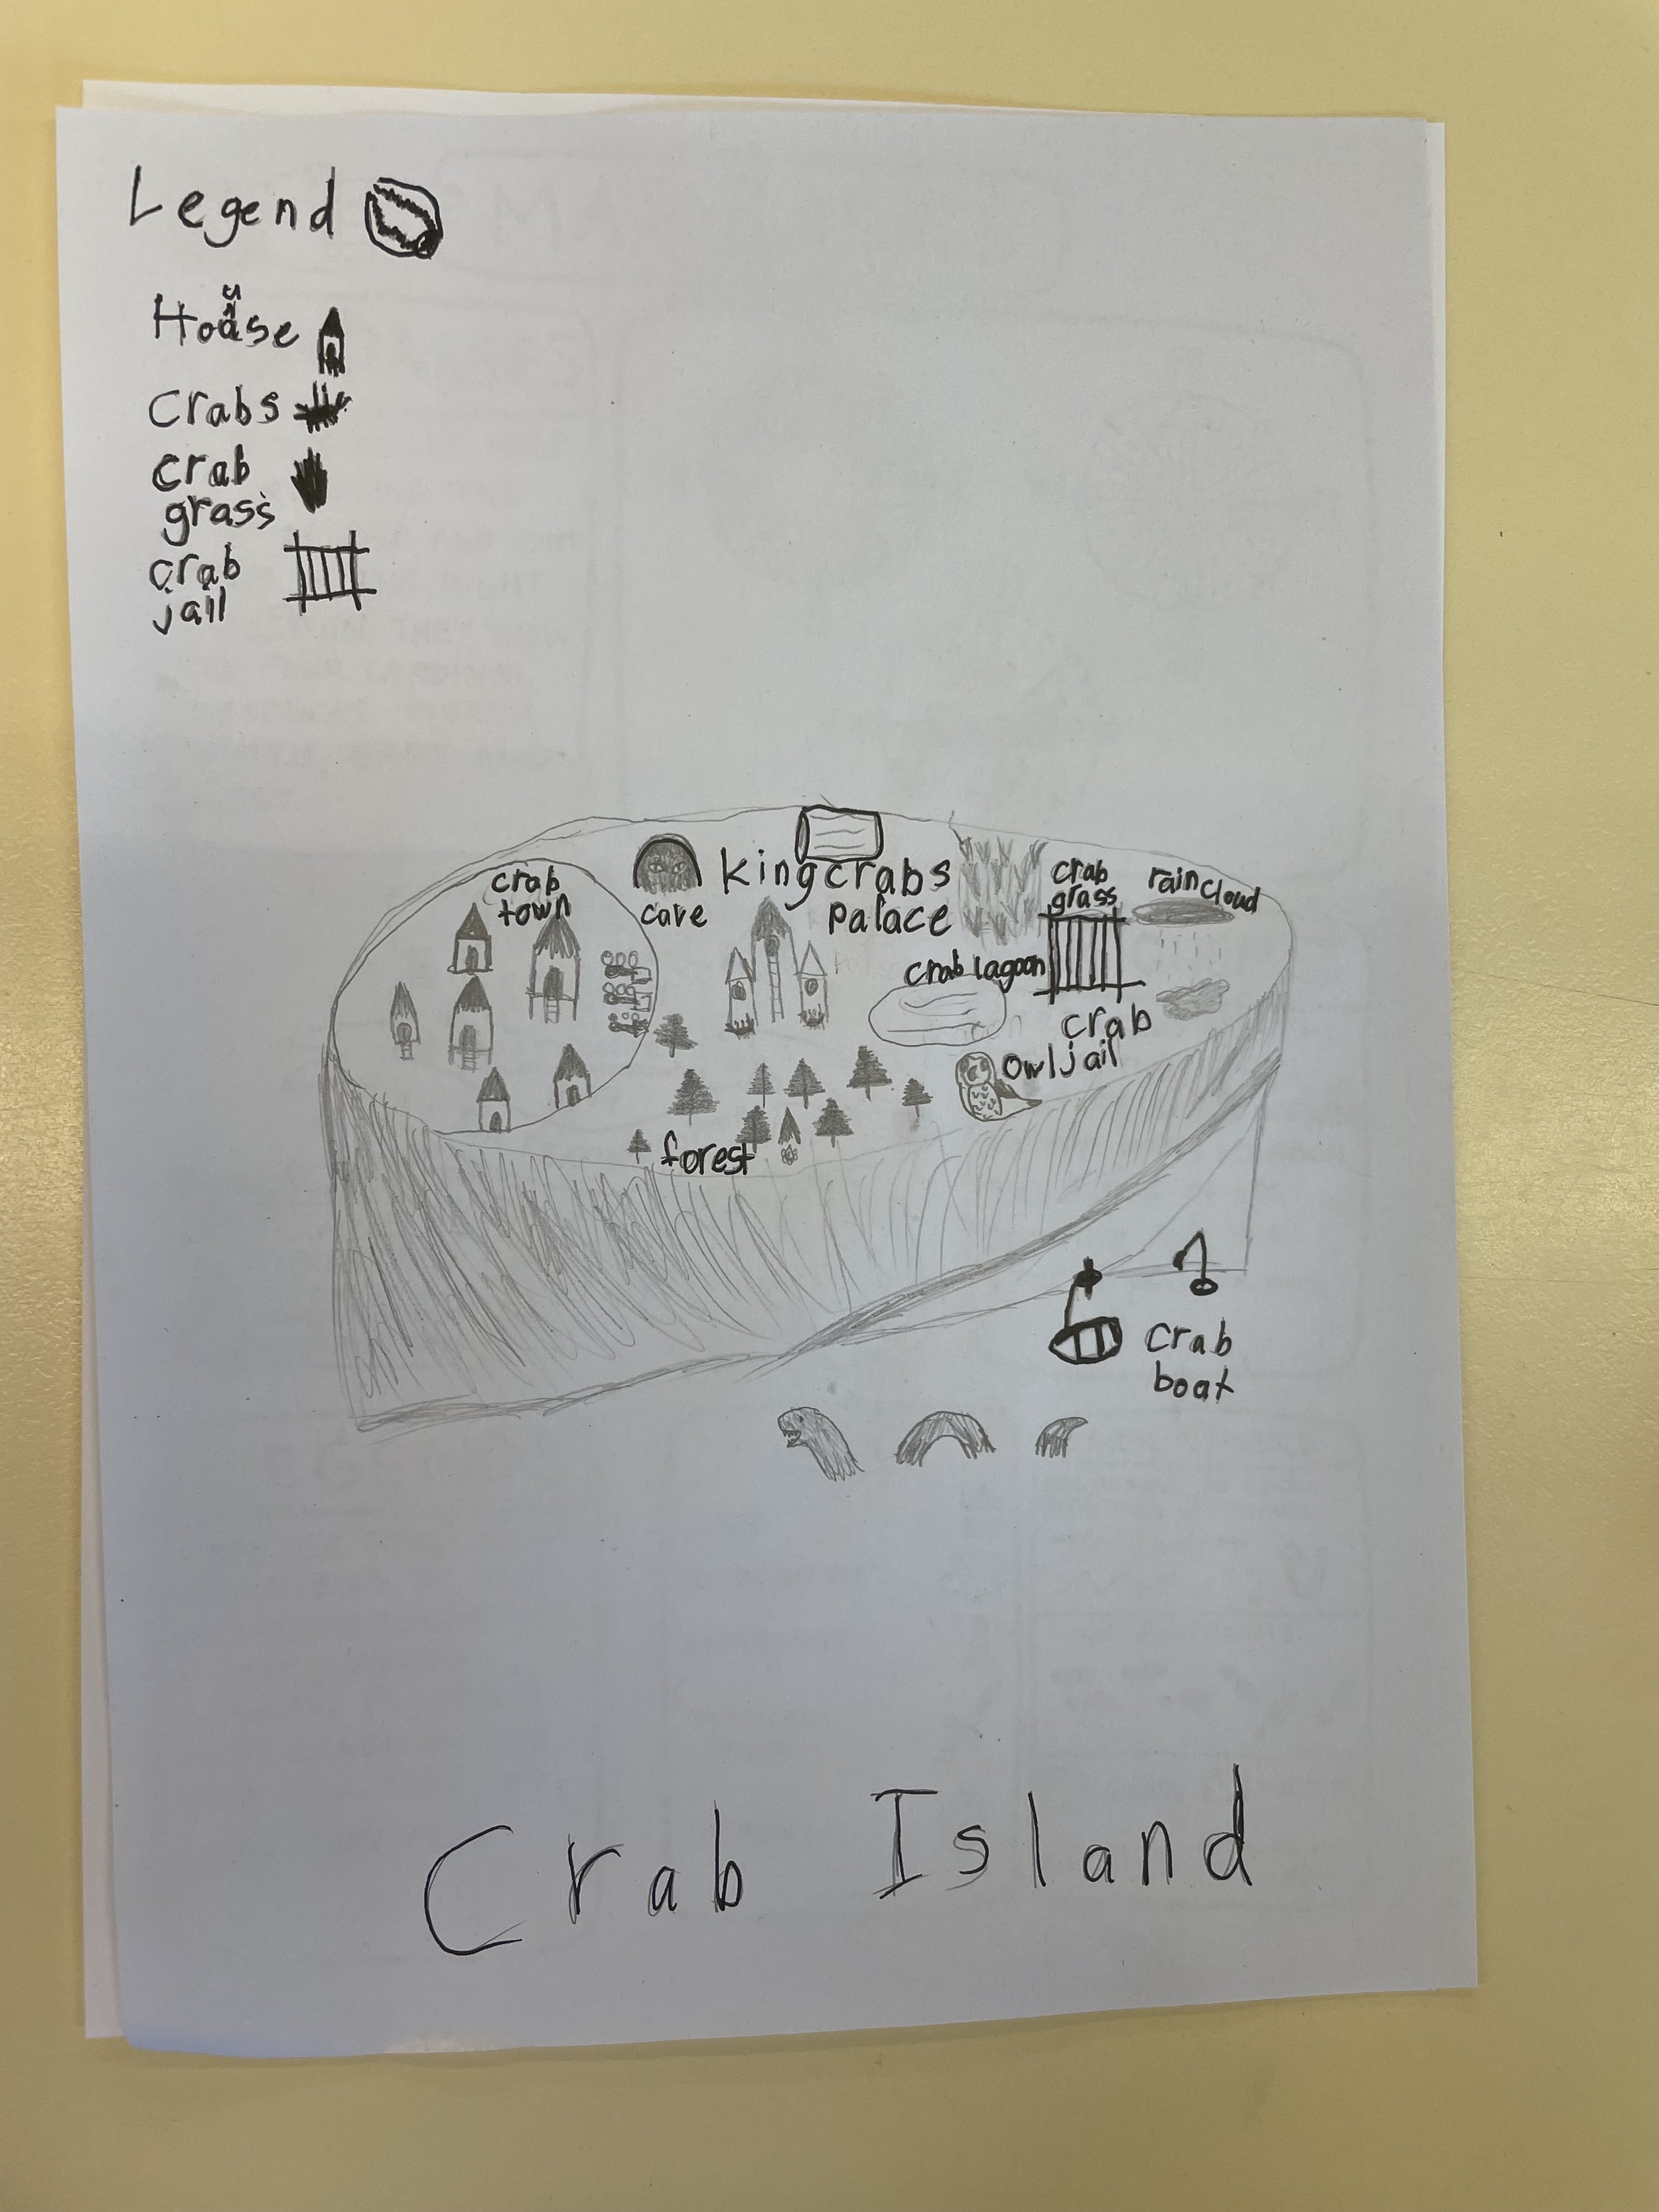
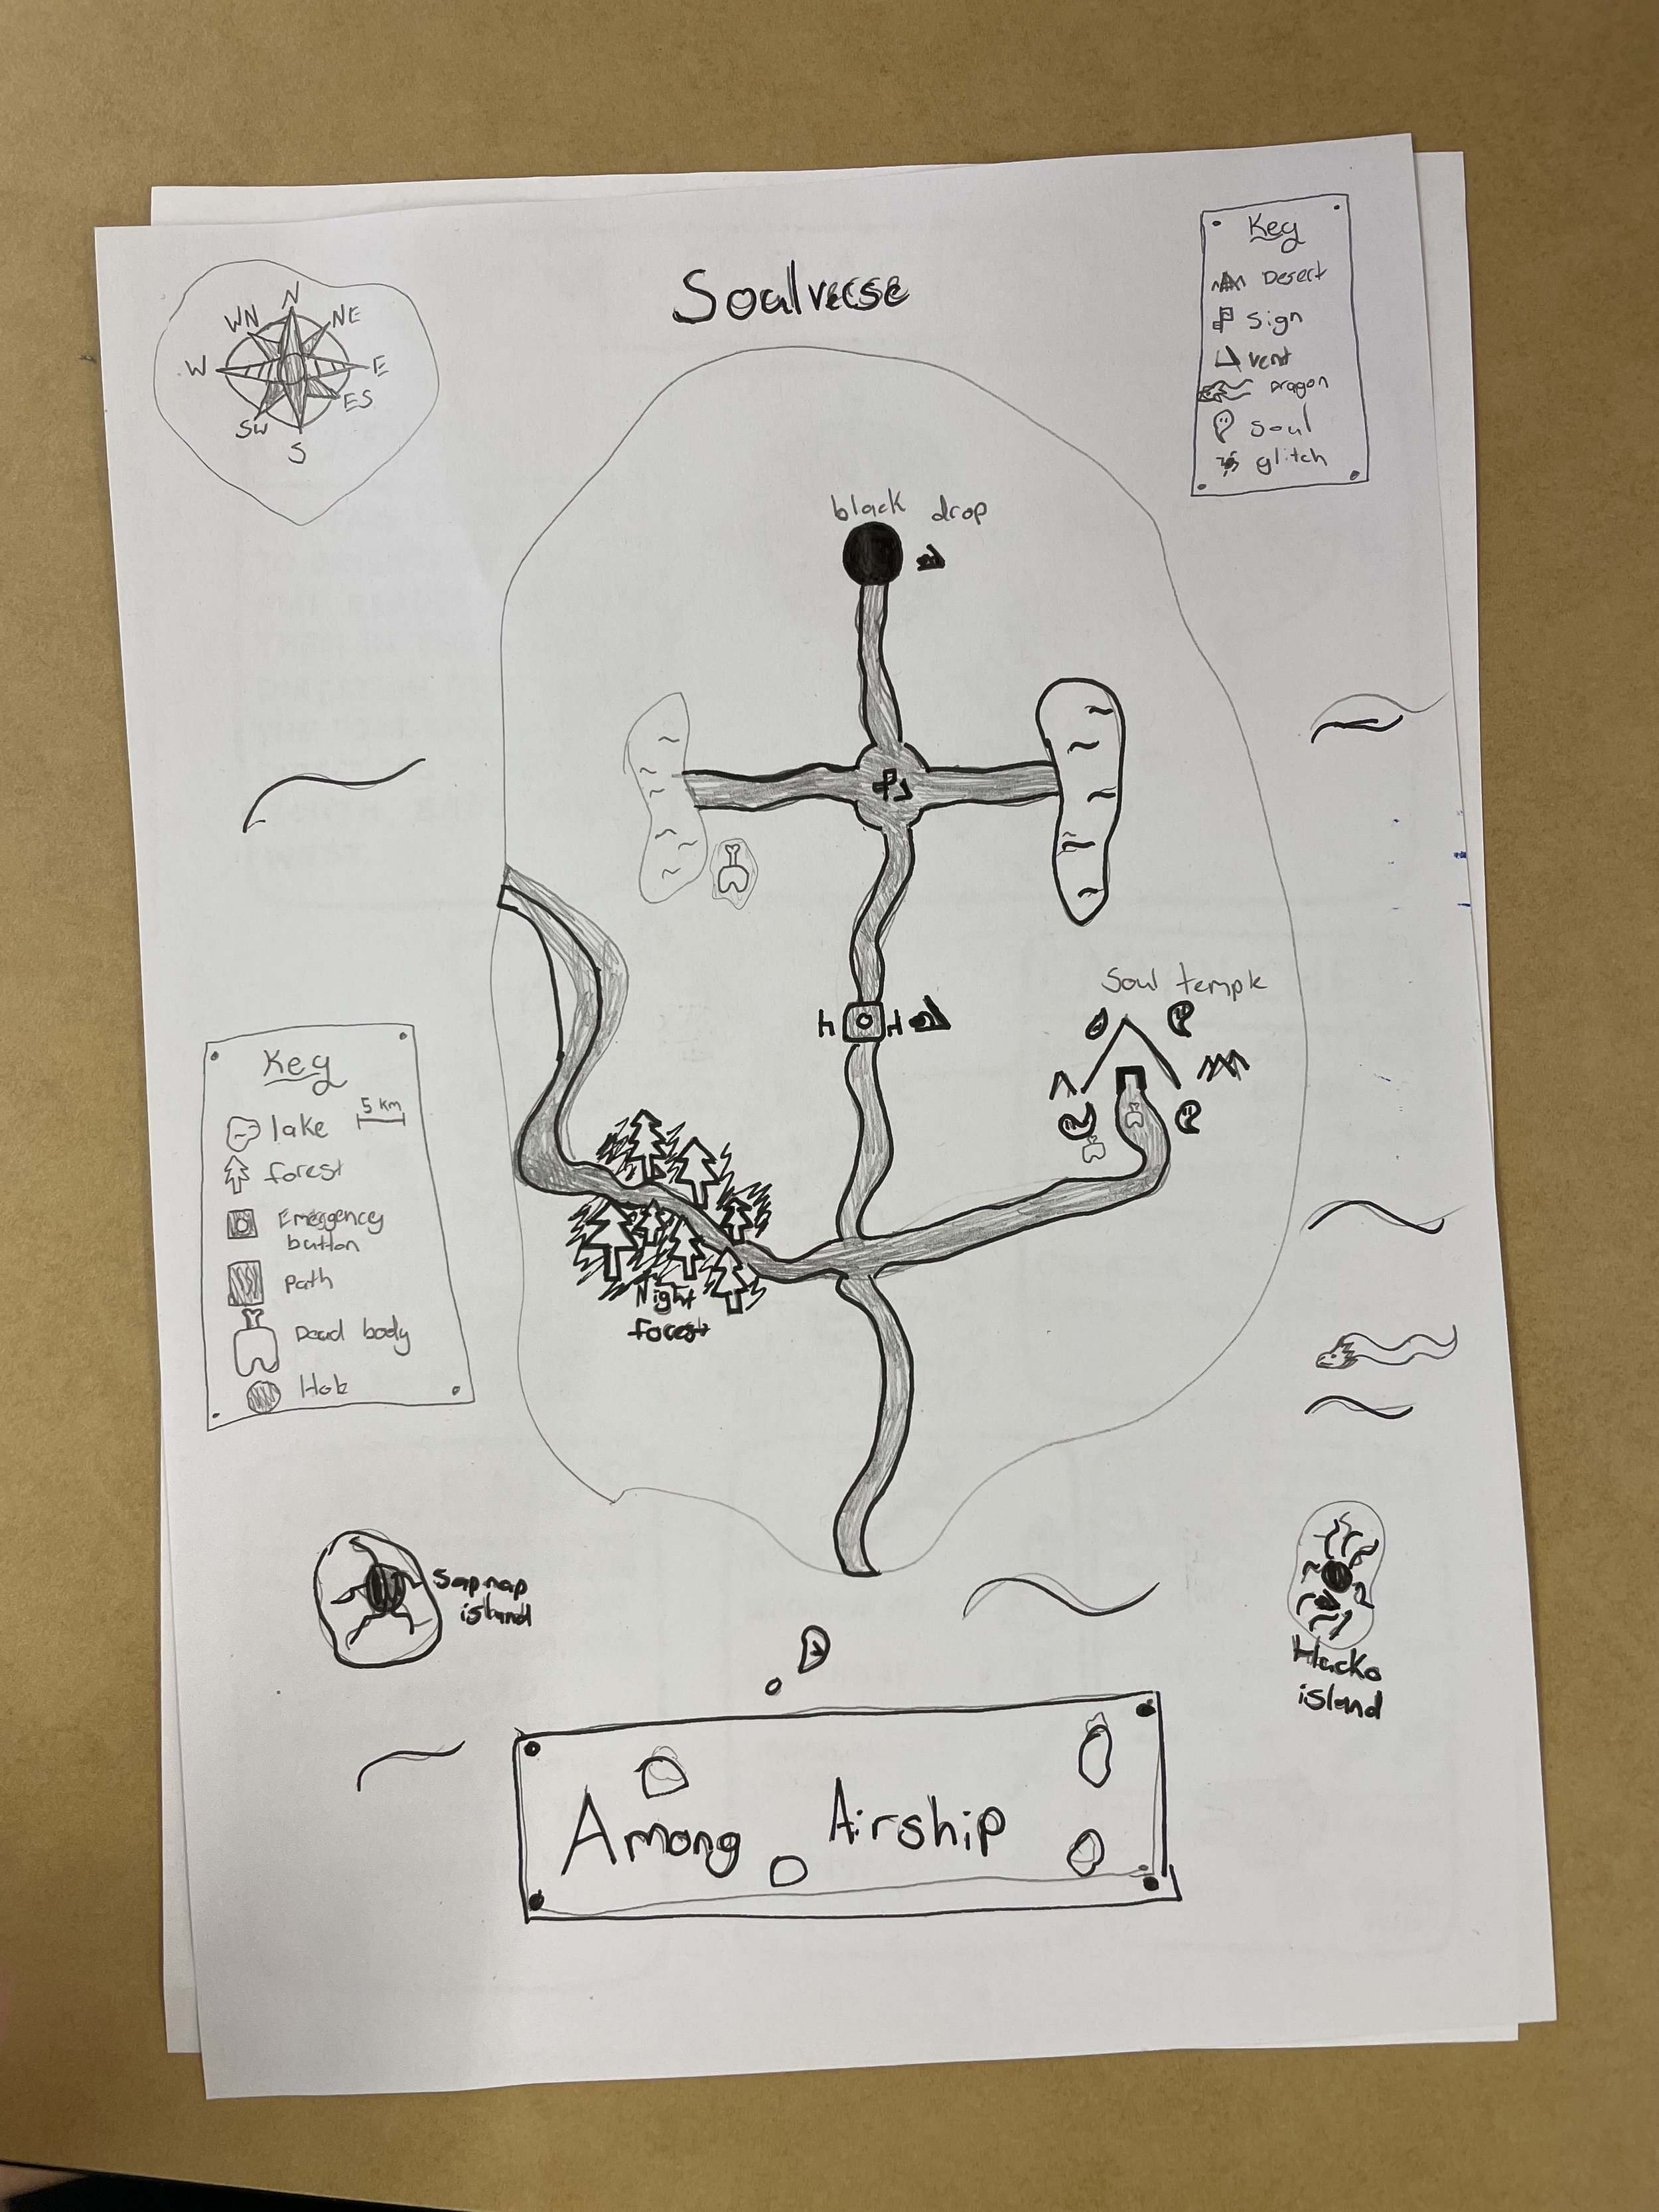
I’ve shared my love of map-making with a variety of my students over the years. Recently I ran my map-making workshop with my Inky Fingers kids and they took to the challenge of making maps like a duck takes to eating popcorn. Here are some of the maps they created. They had to include:

  • A compass

  • A key (with 3 different items, e.g road, forest, lake)

  • A cartouche (a fancy illustrated title for the map, so people know what it is a map of and who drew it)

  • At least 3 special landmarks (e.g. home, a mysterious mountain, the best fish & chip shop).

I’ve been wanting to put together a short map-drawing activity book for a while (maybe once the final art is all done for Oh Brother and I have a bit more free time). But I have created a little guided resource for the workshops I currently run and I’ve just popped a free downloadable PDF version up on my online store. So if you’re looking for a fun summer holiday activity, head here to download it for free.

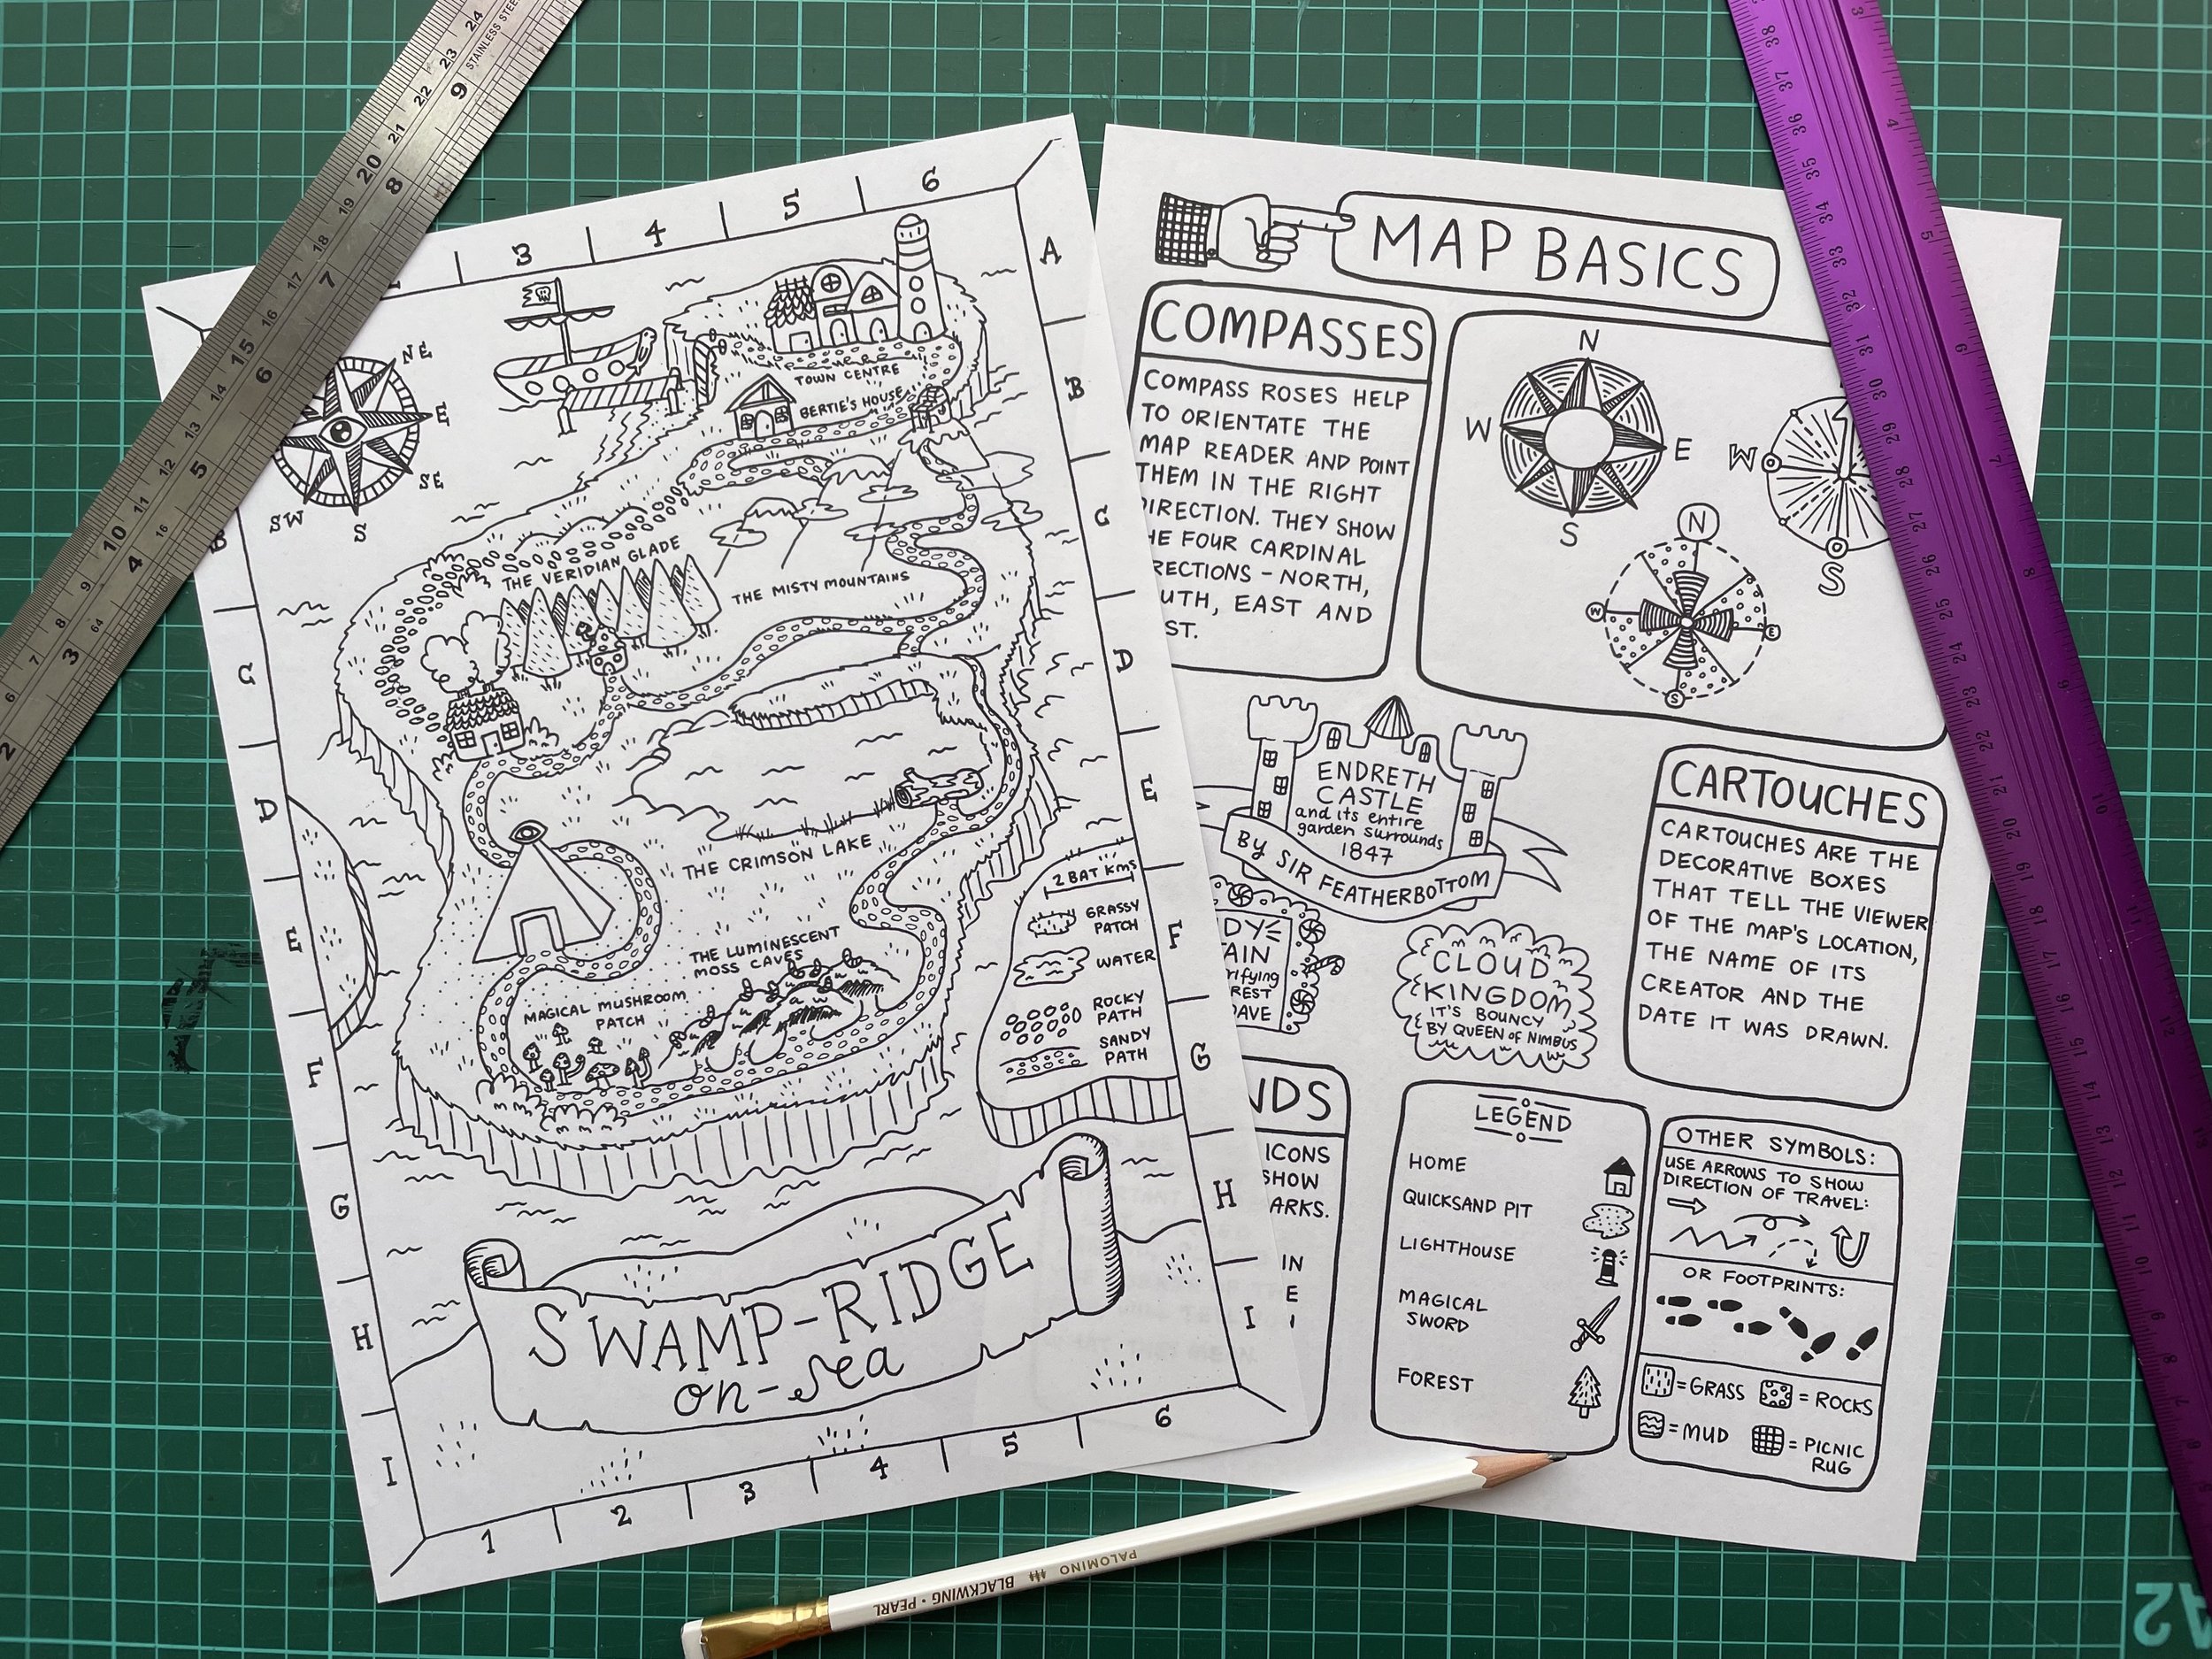
Two black and white worksheets on a green checked cutting board with two rulers and a lead pencil.

I love poring over maps of all types, they help me make sense of a world and give me a feeling of comfort and order. But also there is so much storytelling you can do with maps! If you have a go at making your own map, I’d love to see what you come up with.

A short comic where a friendly postal bat give a map to two lost witches.

Death


Here, for your reading enjoyment, is one of my early “published” works (from when I was 7). This was created for a school assignment. The idea was that we had to create a character using the ever-popular (at least while I was in primary school) computer art program called Kidpix (I really loved that program). I created a character called “Death” (I think my folks had just started reading Terry Pratchett books to me). This masterpiece includes some of my finest illustrative work (poo brown clouds with a variety of emotions) and features Kyra, who is still my friend to this day .

I’m impressed that I already had a grasp of what is “cool” (see: the sun wearing sunglasses).

Noodling around with ink wash


A while back I rediscovered a heap of ink wash pens I’d made back when I thought I would really get into using brushes and ink. I’d decided to start off with brush pens instead of jumping straight into using regular brushes (which seemed tricky and impossible, and still does a bit!). I took three refillable reservoir watercolour brush pens and filled each of them with varying ratios of ink. One pen was mostly water with just a bit of ink, another pen was 50/50 water/ink and the final pen was all ink.

Three brush pens with refillable reservoirs. Each pen has slightly darker ink than the one before.

I tried them out for a bit but at the time I don’t think I really liked the messy line I was making (after exclusively using fineliners my entire illustrative life) and couldn’t push through the uncomfortable perfectionist talk my brain was giving me, so I gave up on that inky brush dream. Recently, however, having used a bit more watercolour, I was curious about trying these out again, but treating them more like shading tools (and keeping those strong fineliner lines I feel confident with. Baby steps!). I mostly used the first two brush pens (the one that is mostly water and the 50/50 one). But I wanted to make sure that the scene I was drawing felt like it should be in B&W, so of course I landed with a fairy private detective in a film noir-style setting. Here are the steps I took to create this piece:

Step 1: Sketch it out

Using whatever scrap paper I had lying around, I sketched out the design loosely. As I wanted to practice my perspective (my nemesis) as well as using only shades of grey instead of colour, I had to draw this scene a few times to get it as close as I could to what I wanted. I was struggling to decide if I wanted it to be in isometric perspective or a more real perspective. I feel like I kinda landed somewhere in between.

Step 1: A rough pen sketch of a pixie sitting in a private detective’s office. The detective is a fairy.

Step 2: Pencil and Ink

Now that I’d come up with a game plan, I popped over to our light table and, on a fresh piece of paper, pencilled out the scene again (using the sketch underneath for a guide). I then turned off the light table and inked the pencilled drawing. You can see where I’ve (not particularly successfully) tried to start marking in where I think the light might fall.

Step 2: A tight drawing of the pixie and the detective fairy. You can see some lead pencil marks under the clean simple inked line work.

Step 3: Final Inks and Ink Wash

I wasn’t super happy with how I inked the scene the first time, so I actually inked it again on a fresh piece of paper (getting out the light table again and using the pencil/inked drawing for the guide this time). If you look closely at Step 2 and 3 you can spot the minor differences in the line work (and some things that are missing!).

Once inked (with a fineliner), I erased the pencils and added in the shading with the ink wash brushes. As someone who generally just block colours everything, it was an interesting experience figuring out what to colour in and what to leave as a highlight.

Step 3: The same scene of the pixie and detective fairy but now it also has ink wash added to give depth, shading and indicate where the light source is coming from.

Although the line work is still a bit wonky, the perspective isn’t perfect and the lighting is…fine, I’m pretty happy with how this turned out in the end. I particularly loved the texture in the picture that came from using paper with more of a rough tooth (I usually use the smoothest of paper as I hate the feeling of my fineliners on a rough paper).

Anyway, that’s it! I really enjoyed working in greyscale and it really highlighted to me how little I know about shading and light. Lots to practice! I would love to do more ink wash and refine those skills for sure. Maybe I should make a whole comic about this fairy detective (or at least paint some keys scenes from a possible story a fairy detective might go through)?

Oh Brother Update 2022


Back in 2016, I started work on a project I thought would take me a year (hah!). This project was to be my first graphic novel: a memoir about growing up with my brother (who is autistic and has an intellectual disability). My goal was to create a book for 12-year-old me, a book that reflected my experiences and feelings and would’ve (hopefully) helped me feel less alone in those feelings and experiences.

From a technical comics-making point of view, I thought it would be pretty straightforward. I’d made lot of mini-comics by that point (but nothing longer than about 40 pages) and I’d made lots of autobio comics before, even some about growing up with my brother. I already had in my mind a lot of the experiences I wanted to share, as a lot of them I already openly talked about with my parents and friends (they had become family fables such as the “Vegemite Parrot story” or the “Pad-peeing incident”. And I’m a pretty quick drawer, so I thought once I got the story down, the rest would be a breeze!

Spoiler alert: It was not a breeze.

I found that not only was there a steep learning curve in making a 300 page graphic novel vs a 30 page mini-comic (let alone watching my drawing style evolve and refine over that first year of working on the book), but there was also a steep emotional learning curve. Working on these stories meant that I relived a lot of my childhood experiences, and some, particularly stories about times when my brother would attack me, were a lot harder to relive than I expected.

Where I’m at right now

After years of working on the book in my spare time, or when I got the support of a residency or fellowship or grant for a more concentrated period of work, I was lucky enough to be approached by my now agent, Annabel Barker. With Annabel’s help (and that of another agent, Dan Lazar), I was able to talk to several publishers that were interested in working with me on the book. And in early 2021, Penguin Random House (PRH) picked up the book in a deal that means it will now be published (ETA 2024) in four territories (Australia, Canada, UK and US).

Although it is super exciting to be working with such a well-known publisher, it’s also been quite nerve-wracking to think that this book that I originally assumed I would be self-publishing is now to be published by one of the major book publishers in the world.

There have been a lot of changes that I’ve had to make while working with PRH (more on that in a future blog post). Last year (2021) and this year (2022) I have been working with my four editors (one in each territory) to re-write the script and thumbnails (the rough comic drawings). It’s definitely been a challenge re-writing something that is so personal to me (and so complex). I would be lying if I said I’ve enjoyed having to make big-ish cuts to a project that has lived with me for multiple years. But saying that, although the book is quite different now, I think I’m starting to feel proud of the type of book it has become.

So far this project has taken: 6 years, 1 scholarship, 1 fellowship, 1 grant, 2 mentors, 2 residencies, 3 peer feedback sessions, 37 blacking pearl pencils, 2 agents, 3 publisher rejections, 3 publisher bids, 1 publisher, 4 editors, 4 territories, 3 versions, 24 therapy sessions, 1 brother, 2 parents, 1 million cups of tea and 1 ongoing case of imposter syndrome.

I’ll be doing more posts soon about the re-writing process and how my art has evolved. But if you’re keen to read more about my early process with the book, check out the Oh Brother tag in my Blog Posts Archive. There are quite a few posts there (although these are from 5 or 6 years ago and I haven’t recently re-read them, so I’m not sure how similarly I feel now — I’m not ready to re-read them yet).

Also, for those who are curious about all the steps I’ve taken with Oh Brother over the years, here’s a timeline:

Timeline of making Oh Brother GN

2015

  • The idea for the GN starts forming

  • Created short comic stories about Rob and me that were published in Voiceworks and the comic anthology Australia

  • Took part in Comic Art Workshop residency on Maria Island (but workshopping a different memoir comic)

2016

  • Put aside other memoir comic to focus on Oh Brother

  • Received the Colin Thiele Scholarship for Creative Writing through Carclew

  • Worked with Mandy Ord & Pat Grant as mentors

  • Kept a weekly blog about the process of working on the book

  • Finished pencil draft of part 1 (approx. 100 pages)

  • Created a comic about growing up with Rob that was published on The Nib

  • Printed an Oh Brother mini-comic sampler

2017

  • Received the Ian Wilson Memorial Fellowship from the May Gibbs Children’s Literature Trust

  • Finished pencil draft of part 2 (approx. 150 pages)

  • Quit my day job at the ABC

  • Took part in Comic Art Workshop residency on Jogjakarta (received feedback on the pencil drafts of two-thirds of the book & the script of the final third)

2018

  • Dead year. Kept trying to tackle editing the final section of the script but struggled to get anywhere

  • Cried a lot

  • Did some other things. Probably

  • Spent 6 weeks in Melbourne working with 100 Story Building

  • Spent 9 weeks travelling overseas

2019

  • Started therapy for the first time, turns out most people don’t cry all the time

  • Co-organised the first Papercuts Comic Festival

  • Took part in Comic Art Workshop residency on Dangar Island

2020

  • Contacted by Annabel Barker (literary agent) through website

  • Signed on with Annabel & developed a pitch for publishers

  • Annabel brought in Dan Lazar (New York agent) to help with the American side of things

  • Sent out book pitch to publishers and waited to hear back

  • Had phone conversations with various interested editors from different publishers in US and Australia

  • Received Independent Artists and Groups grant from Arts SA

2021

  • Three publishers put in offers for the book

  • Accepted PRH offer!

  • PRH took forever to send through a contract (four territories even within the same publisher don’t often talk to each other)

  • Started work on re-writing the book, creating a new story outline (making the story more narrative) and taking away the adult perspective of the story

  • Received PRH feedback on the outline, which was as long as the outline itself :/

  • Wrote a new script

  • Co-organised the second Papercuts Comics Festival (and was totally burnt out)

2022

  • Received script feedback from PRH in January (four months after submitting script)

  • Feedback was extensive, with the major notes being that the page count needed to be reduced (and some elements needed to be adjusted for the American audience)

  • Started tackling thumbnails

  • Had to renegotiate the thumbnail deadline several times because taking on the feedback turned out to be harder than expected

  • Completed the thumbnails!

  • Will take part in Comic Art Workshop residency at Yarrangobilly Caves

  • Received Professional Development grant from Arts SA to attend Comic Art Workshop

  • Currently awaiting feedback from editors about thumbnails

Experimenting with Watercolour


New BFFs Tina and Tori sit in their pyjamas, eating lollipops and reading comics on Tina’s bedroom floor.

I know that my last post was all about how I’ve been slowly moving towards working entirely digitally (which is really useful when working with clients and editors and I’m having to make lots of tweaks and changes on a project), but I think working so much on my iPad for work-based illustration and comics has pushed me into wanting to try out different mediums when making fun illustrations for myself. In particular, I’ve really been keen to get into watercolour.

Tina is wearing her favourite clothes that make her happy, showing off her multicoloured scarf and green tile skirt.

I’ve tried delving into watercolour a few times: I’ve tried plein air painting, I’ve asked friends for tips, I’ve watched YouTube videos. I aways thought that if I just found the “right” set of watercolours that it would all make sense and I’d be able to paint the images like I could see them in my head. But what has really stopped me in my tracks every time I’ve tried my hand at watercolours is the fact that I’m just not that good at using them straight away (not that there is any reason why I should be naturally adept at watercolours). So I kinda give up before I give myself a chance to really learn how to handle them.

My watercolour tribute to Mr Tod (the kind-of-a-jerk fox gentleman character from Beatrix Potter’s book).

With some (possibly unfounded) optimism that this time would be different, for my birthday this year I treated myself to the Kuretake Gansai Tambi watercolour set. I’d seen a few mates use them online and they looked quite different to other watercolours I’d tried before. And they are pretty lovely to use, almost more like a gouache so the colours are more opaque (less see-through) than other watercolours. As I’m so used to working in smooth flat digital colour, I find that that the washy-ness of watercolours makes my attempts look not like my own art. (Although I love this look in other people’s work, I’ve found I don’t love it for my work.) However, when I started playing around with the Gansai Tambi’s more opaque pigments, I found them really pleasing to use and like I had more sense of how to handle them. Plus, the colours are delightful and warm my soul.

Kuretake Gansai Tambi 48 colour watercolour set (includes a really great pink and lilac as well as boss metallic colours).

Although I’m enjoying watercolours a lot more this time, it does feel like I'm back to basics and having to learn how to make art yet again. But I’m really excited about learning new art skills and how to control and use watercolours so they can help me create more interesting works. This time that I’ve delved into watercolours, it feels like a puzzle to solve instead of me just failing at something I “should” be good at. My brain feel like it clicks into gear and wants to make the images in my head appear on the page in front me.

A fancy-looking anthropomorphic dog with a moustache wearing a red dressing gown stands in front of an old and full bookcase. They are holding a bone in one hand and an old-fashioned smoking pipe in the other.

After chatting to another friend, they mentioned I should try using coloured pencil on top of the watercolour for more detailed things, which I loved when I tried it out with this fancy dog in a smoking jacket picture (see above). I haven’t really tried all the possibilities with pencils & watercolour yet but I’m keen to see where that could go too. Sensory-wise, it feels really nice to draw with pencil over the watercolours.

Scully, junior “repawtor” for the The Fire Hydrant, sits, bored, at their desk waiting for an exciting story to break.

I love the flexibility of working digitally but nothing draws me into a work more than if it’s traditionally watercoloured or coloured by pencil (particularly if you can see the mistakes or wobbles the artist has made). There is something about the hand-made nature of it and the textures of the paint on paper that speaks to my soul. Maybe one day I’ll be able to make a watercolored picture book. I do not think that I will ever watercolour a whole comic though. That way madness lies.

My transition to working digitally


Bundle (a mushroom person) and Bugg (Bundle’s pet bug) stand out the front of their home in an old tree.

Over the past few years, I’ve really transitioned to working digitally over traditionally. The switch happened slowly at first: I would still pencil and ink everything traditionally but scan it and then colour in Photoshop. But when the response of the Apple Pencil on the iPad started to feel almost exactly like using a regular pencil and I discovered the app Procreate (plus factoring in the ease of being able to create work on the go, anywhere, with just one tablet and one pen), I couldn’t resist the lure of digital.

A character with one prosthetic leg, wearing a tank top and shorts, standing in a welcoming position.

One of the things I've discovered when drawing digitally is that I've been able to experiment more with my art, without freaking out that I’m going to ruin everything. When working traditionally, the permanentness of using pens, textas, or paints can sometimes almost make me freeze (particularly when my perfectionism comes into play). But the flexibility of working digitally (sure, being able to undo is nice, but also to be able to copy, stretch and rearrange things easily) has really opened up a lot of options for the work I create. I can practice pushing my characters’ poses or getting that emotion exactly right on their face or try different colour combinations without worrying that if I commit to one and it doesn’t turn out okay, I’ll have to re-draw the whole image to practice it.

A character in full shadow wearing a woollen jumper and patched jeans holds their hand up to their eyes and is looking at something far away.

Working with light and shadow is something in particular that I’ve really gotten into playing around with when drawing on my iPad. Usually my drawings use simple clean lines with flat colours, but I’ve really enjoyed starting using coloured lines for textures ( e.g. in clothes, hair) as well as adding shadows to create a bit more depth to the flat images. More recently I’ve started playing around with adding highlights too - I’m still a while away from feeling like I’ve got a handle on those but it’s coming along.

A wizard in a purple robe covered in yellow stars and moons is holding a glowing orb and has a magical aura around them.

Full colour illustration of 5 roller derby players in roller skates and safety gear posing together looking tough and confident.

One of my favourite things about working digitally are the accidents that turn out to be really interesting and get me thinking about how I could colour in a different way. For example, I drew a collection of fictional roller derby players and coloured them as I normally would - natural, flat colours, add some shading for depth and then highlights to help create a sense of roundness in the characters. At one point I’d switched to the wrong layer and when I went to drop some colour into one of the characters I accidentally just blocked out all of the characters in this salmon pink colour. Initially I was all “Gah! Silly me!” Wrong layer!” but looking at the result I really loved how it turned out. It opened up my brain to thinking about how I could be using colour differently when making comics. I’m keen to see what a full comic of block colours might look like.

Pink & purple illustration of 5 roller derby players in roller skates and safety gear posing together looking tough and confident.

I still love working traditionally (I don't think anything will ever quite beat the scratch of pen on paper) but I think that working digitally has really helped me grow as an artist and refine my skills, so whenever I jump back to working traditionally (or try out mediums I’ve never used much, like watercolours or colour pencil or stamp carving), I feel more confident about giving things a go (and not worrying about whether they turn out exactly right).

Poppy & Gina's post-it note challenge


When I’m not reading comics, talking about comics with my friends or making my own comics, I teach comics. I predominantly run one-off workshops in schools and libraries, mostly to excellent children and young people. But I also have a few students that I teach privately, one-to-one. One of these students is the lovely Poppy.

I’ve worked with Poppy for a little while now - in lessons we generally talk about drawing techniques, try out different art mediums or materials, and chip away at putting together original comics (Poppy will be selling her very first comic at the upcoming Zina Warrior Print Fest). One of the drawing activities we did recently was a daily character challenge. During one lesson, Poppy and I came up with a list of 30 characters (e.g. a fortune-telling mermaid or a goth unicorn), one for each day in June (each of us taking turns to come up with a character). The aim was to draw a character a day, with the only restriction being that they had to be drawn on post-it notes.

I absolutely love these kind of challenges, although I have to admit that I can also find them very hard. I really struggle to put time aside for myself just to draw (when it’s for no reason other than fun). Also sometimes my perfectionism can sneak in and stop me enjoying the thing I love most - telling stories with pictures.

But having the restriction of the post-it note was really helpful for me to finish this challenge. It gave me a boundary to work within and meant that I felt more inclined to push that boundary (like trying to fit in full scenes onto my small little post-its and not just characters). And I was really happy with how a lot of them turned out and even prouder of myself for pushing through the days where I wasn’t so happy with the work and still sitting down and doing the next day’s challenge. Perfectionism in my work is something that I struggle with A LOT (although you wouldn’t necessarily know it from looking at my wonky imperfect art) and I have to keep catching myself when I get stuck In a perfectionism spiral and remind myself to just put pen to paper, and it can’t be perfect but it can exist.

In the end I had a lot of fun designing these characters (there are definitely a few that I wouldn’t mind maybe turning into full-comics ideas) and it was particularly fun to do the challenge with a friend and see how different or similar our characters turned out to be. Here are some of Poppy’s favourite designs:

Looking to take on a fun drawing challenge? Why not try out our post-it note drawing challenge for yourself (and a friend)!

All you need:

  • Pen

  • Post-it notes (your choice of colours)

  • A month with 30 days (so you can draw one a day)

  • Our character list below!

If you do decide to take on the Poppy & Gina post-it note drawing challenge, let me know! I’d love to see your versions of our characters.

Poppy and I will be selling physical zine versions of this list and some of our favourite characters at Zina Warrior Print Fest. If you’re on Kaurna land (Adelaide) on the 8th October, come along and say hi!

I’m getting the blog back together!


Portrait of the artist in the middle of graphic novel creation mayhem.

Hello dear reader,

I know it’s been a hot minute since I’ve posted in the blog and I’m just letting you know that I’ve decided to dust off the website crank and rev up my ol’ blog again.

A lot’s happened during the time the blog has been on hiatus (officially on hiatus since 2017). During this time I’ve gone from juggling working many different part-time jobs (retail, teaching, illustration, comics) to working full time as an artist (which still involves most of those things — but fortunately no more retail). I’ve co-founded and run an award-winning comics festival, assisted in running a zine fair, printed multiple mini-comics, run (what feels like) a million comics art workshops in schools and libraries, and attended two Comic Art Workshops (one in Indonesia and one on Dangar Island — which I mention specifically because of its cool name). I continued to play roller derby (I’ve been playing for more than 10 years now!) and eat pizza. There was a pandemic. I tried to learn skateboarding (still working on that one). I got an amazing agent who is helping rep me and my work. I moved out of the city and bought a house in the burbs with my partner (we have a huge backyard now, filled with plants and birds AND we have a room each for our studios). I have read a LOT of comics. And most excitingly (for me), my graphic-novel-in-progress, Oh Brother, was picked up by the publisher Penguin Random House!

(Ahhhhh!)<————— (combo excited and terrified scream.)

Since moving to full-time freelance last year and having the book picked up, I’ve been thinking about bringing back my blog, as I first started writing it when I began working on the Oh Brother project back in 2016. Originally it was to keep track of my progress on the book for a grant acquittal but it quickly became a nice way to reflect on what I was learning, celebrate the successes and help me to make sense of the quirks of long-form comics making.

At this stage I’m not sure exactly what form the new blog will take — there will definitely be posts about working on Oh Brother and making comics. But I also think I’ll post about what I’m reading/enjoying, ideas I have and other projects I’m working on. Some posts will be long and some will be short, there might be several posts in a week or none for a few weeks. I worry that if I set up a strict posting schedule that I will inevitably get busy and not be able to live up to my self-imposed perfectionist pressure and then not do anything at all (and feel terrible about it).

One thing I do know is that I want to slowly replace my social media presence (I really struggle with balancing social media & mental health) with my website. But at the moment social media is still a pretty necessary tool for me as a working artist. My current plan is post everything/most things to my blog and then cross post to instagram with a short caption and a prompt to check out the full thing on my website.


As I mentioned above, I’ve been wanting to start the blog up again for a while, but, you know, perfectionism. So instead of overthinking it (any more) and planning it to the nth degree, I’m just going to jump in, start her up and see how things go and let them develop naturally.

I hope you’re looking forward to coming along on this ride with me!

Gx